• Skip to primary navigation
  • Skip to main content

Hobrecht Lighting

  • Buying Guides
  • Styles & Trends
    • Bathroom Lights
    • Ceiling Fans
    • Ceiling Lights
    • Lamps
    • LED Lights
    • Outdoor Lights
    • Smart Lights
    • Wall Lights
  • Wellness & Safety
  • Shop Products

Styles & Trends

Ceiling Fan Terminology Explained

Ceiling Fan Terminology Explained

by admin · Feb 2, 2025

A Helpful Glossary of Common Ceiling Fan Terms

If you’re shopping for ceiling fans and it’s starting to feel like the descriptions are written in code, don’t worry! We’re here to solve the mystery with a list of basic terms you’ll need to know when looking for the right ceiling fan.

Ceiling Fan Types

Ceiling fans are most often categorized by their motor type, mount type, and/or weather rating. 

Motors

AC and DC Motors

AC motors (alternating current motors) are the most popular ceiling fan motor. They’re typically less expensive than DC motors, which is great for budget buyers. They are relatively energy efficient, are very reliable, and come with around three to four different fan speeds. 

DC motors (direct current motors) are a newer technology and often use a remote instead of a wall switch. DC motors make a quieter, more powerful fan with more speed options and are more efficient than AC motors. 

Dual Motor

Dual motor fans have two adjustable fan heads attached to a central motor. Each head is adjustable to its own speed and angle. 

High-Velocity Motor

A high-velocity fan is a powerful fan. It produces a higher-than-normal amount of airflow, providing you with a stronger breeze. 

Mounts

Downrod/Shank/Extension Rod

The multiple terms for this accessory are purely regional, and all mean the same thing– the rod or bar installed between the ceiling and the fan. Downrods can be used in many rooms but create the most impact in rooms with high ceilings. Not only do they pull the eye upwards and make the room feel bigger, but they also bring the air circulation closer to you.

Standard Mount

This type of mounting system is for level ceilings. Standard mounts usually come with a 3- to 5-inch downrod, so the fan slightly hangs down into the space.

Hugger or Flush Mount

These are perfect for low ceilings and tall people. Huggers are mounted against the ceiling and don’t use a downrod. Depending on the ceiling height, huggers or flush mount fans can help the ceiling seem higher while keeping your air circulated and fresh.

Low-Profile Fan 

For a fan to be considered low-profile, it must hang down less than 12 inches from the ceiling. Most low-profile fans are flush mounts, but some fans with short downrods are small enough to qualify as low-profile as well.

Sloped Mount 

A sloped mount is a mounting system that includes a downrod that allows the ceiling fan to be installed on a vaulted or slanted ceiling. The base is designed to let the downrod and fan hang at an angle when mounted so that the fan will be perpendicular to the floor.

Rating

Wet Rated or Outdoor Rated Fans 

Outdoor or wet rated fans are designed to withstand direct contact with rain and snow. Carefully read the packaging of your outdoor fan because not all fans can handle the same weather exposure. If you live in a particularly wet or stormy area, you’ll need a tougher outdoor fan.

Industrial and Commercial Fans

Industrial fans have powerful motors and curved blades, and they can run continuously, making them ideal for large, open areas like warehouses and gyms. Commercial fans are heavier-duty than standard fans and more aesthetically pleasing than industrial fans. They’re commonly found in schools, businesses, and restaurants.
Ceiling Fan Measurements 

This section covers the most common measurements used to describe a ceiling fan’s function and size.

Airflow (CFM)

Cubic feet per minute (CFM) refers to the amount of air moved by a ceiling fan, using the amount of air moved per cubic foot in one minute as the metric. The higher the airflow a fan uses, the more efficient your home can be as you recycle heated or cooled air. According to Energy Star, 75 CFM is the minimum airflow of an efficient ceiling fan.  

Blade Pitch 

The pitch measures the angle of the blades compared to the ground. Fan blades are slightly angled to push the air around. (If they were parallel to the floor, they wouldn’t do much!) The angle of blade pitches typically ranges between 10 and 25 degrees, but the most efficient is from 10 to 15 degrees. 

Blade Sweep or Span 

A fan’s sweep or span measures the diameter of the circle created by the blades. You’ll need to know the span of your fan to make sure it will fit properly in your room – if it’s too large it could scrape walls or snag curtains. On the other hand, it may be distracting and look out of place if it’s too small.

Motor Speed (RPM)

Revolutions per minute (RPM) refers to the speed of the blades as they rotate, measured by how many times the blades make a complete circle in one minute. High RPM fans move more air than low RPM fans of the same size, making them more efficient. 

Watt Equivalence

Some fans will require more electrical power (watts) than others, so it’s essential to have a good understanding of how much strain your new fan will put on the existing circuit. A good rule of thumb is the longer the fan blades, the more watts it will use. Expect your fan to use 55 to 100 watts.

Weight

Residential ceiling fans typically weigh anywhere from 8 pounds to 50 pounds. Keep in mind that lightweight ceiling fans are designed to hold their weight alone. You should never add anything to a ceiling fan that wasn’t in the original kit without carefully reading the manufacturer’s instructions. Some ceiling fans allow for customizable light kits. In that case, be sure to check the packaging for how much additional weight it can hold.

Number of Speeds

Most ceiling fans will have multiple speed settings so that you can control the amount of airflow and circulation in your space. Most fans will have three speeds (slow, medium, and maximum speed). You’ll also want to see if your fan can reverse direction– this will help pull warm air down from the ceiling during the winter and help to cycle your heated air.

Dimensions

You’ll need to check several measurements to ensure your fan fits correctly in the space. For example, both depth and width can refer to the blade span (or the size of the circle the fan will make). The width can also describe how wide the individual blades are. Finally, as mentioned earlier, the downrod is the pole that connects the fan to the ceiling mount. Together, these three dimensions will tell you how much space the fan will take up.

Pro tip: All fans are designed for specific square footage, meaning that some are designed to push air through large rooms while others are for small rooms. Fans designed for bigger spaces would be disruptive in a smaller room (and vice versa). The packaging of your fan will tell you the intended size of the room, so make sure to check the square footage of the intended space and match it to the appropriate fan. 
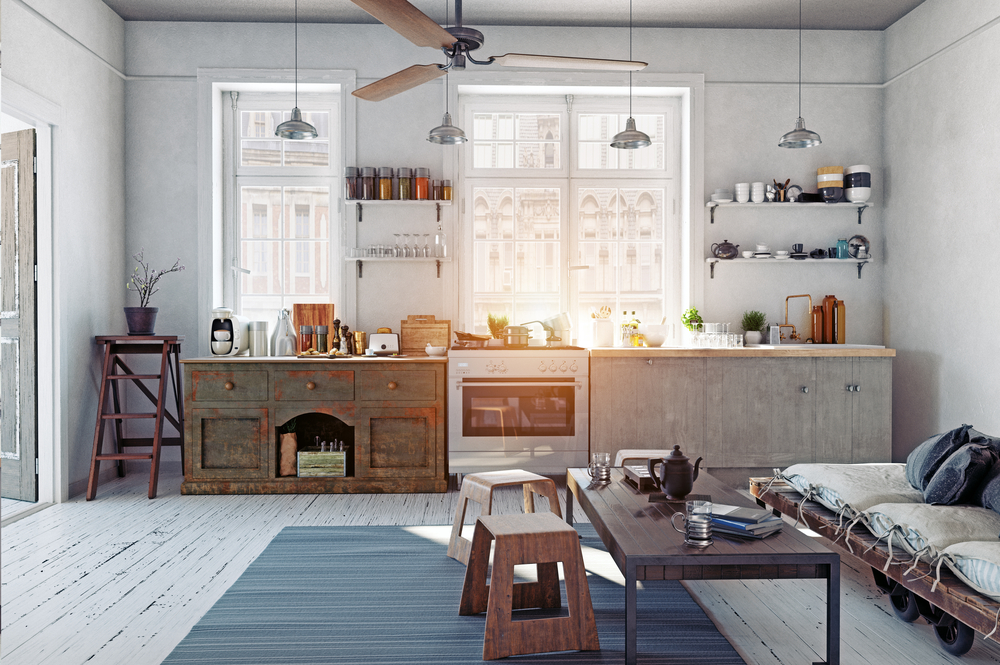
Parts and Accessories 

The final section describes potential upgrades and customization options to consider while shopping for your ceiling fan.

Light Kits

Many fans come with a light fixture attached (called an integrated light), but some can be purchased and attached depending on the fan. There are three different light kits that you can use with your fan: uplight kits which sit on top of the fan and point upwards, branched or stemmed kits use globes or shades that point up or down, but the most common light kit is the bowl or shade kit which attaches to the bottom of the fan. Keep in mind that some ceiling fans with an integrated light may not include a bulb– you may need to purchase bulbs separately.

Remote Control

Many fans available today are remote control or smart-home compatible. A remotely controlled fan may seem like a luxury, but it’s also very practical – especially for those with extremely high ceilings! Depending on the model and features, you’ll be able to adjust the lights, fan direction, and fan speed with ease. 

Reversible Blades 

Some fans allow for their blades to spin either clockwise or counterclockwise. This functionality helps to customize airflow according to the season. For example, the blades should turn counterclockwise in the summer to push the air down (a downdraft), providing cool breezes.  The fan blades should rotate clockwise to pull air upwards (an updraft) in the winter, efficiently recycling heated air without cooling the room. You can either toggle the switch on the fan or use a remote to change the direction of the blades. 

———————-

Ready to switch out your builder-grade fan or install a new one in the place of an existing light fixture? Now that you have a reference to all of the features and parts of a ceiling fan, you can shop confidently.

If you’d like additional information, a professional opinion, or installation assistance, contact the experts at Hobrecht Lighting, and we’ll make sure you get exactly what you are looking for! 

Filed Under: 2022, Buying Guides, Ceiling Fans, Informational

5 Simple Tips to Boost Curb Appeal

5 Simple Tips to Boost Curb Appeal

by admin · Jan 26, 2025

They say not to judge books by their covers… but isn’t that what the cover is for? A book’s cover can give off a vibe that will help you decide on an impulse if that book is for you. Your house’s exterior is its cover. Based on its appearance from the street, or curb appeal, passersby (or potential buyers if you’re selling) will decide if it’s worth their time (and money) on a split-second impulse. 

Whether you’re trying to sell your house or increase its value, the look and feel of the exterior of your home has a significant impact on the bottom line. The good news is, giving your house a cover anyone would want to open is simple with these tips!

Tip 1: Add and Update Lighting

Light makes a huge difference when it comes to curb appeal. Choose modern fixtures or timeless classics, but make sure you have a variety of quality lights so that no matter what time of day, your house–and the landscaping you’ve worked hard to maintain–shines. 

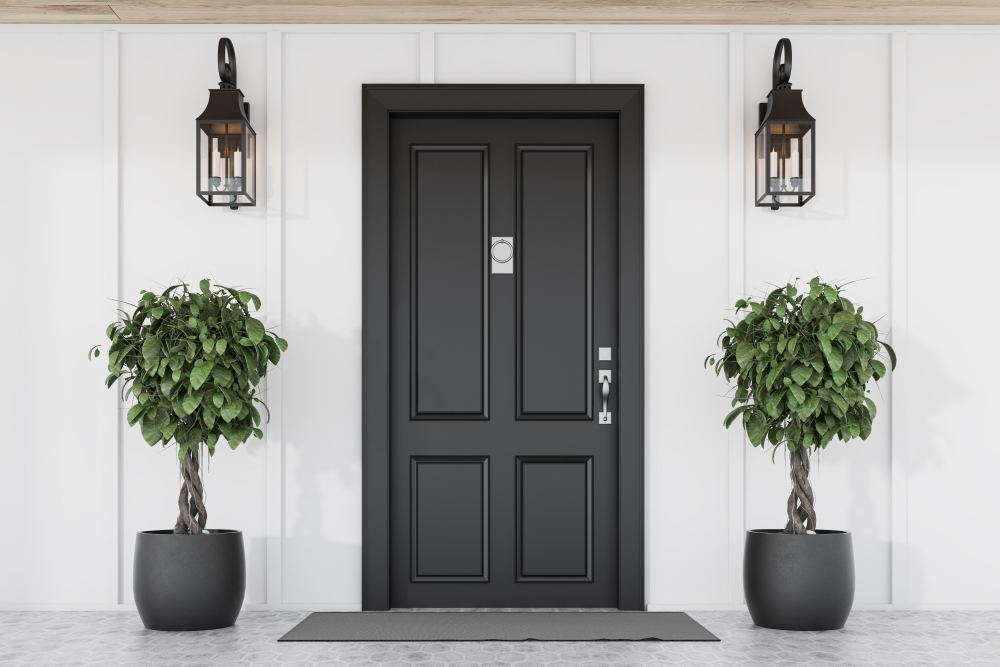
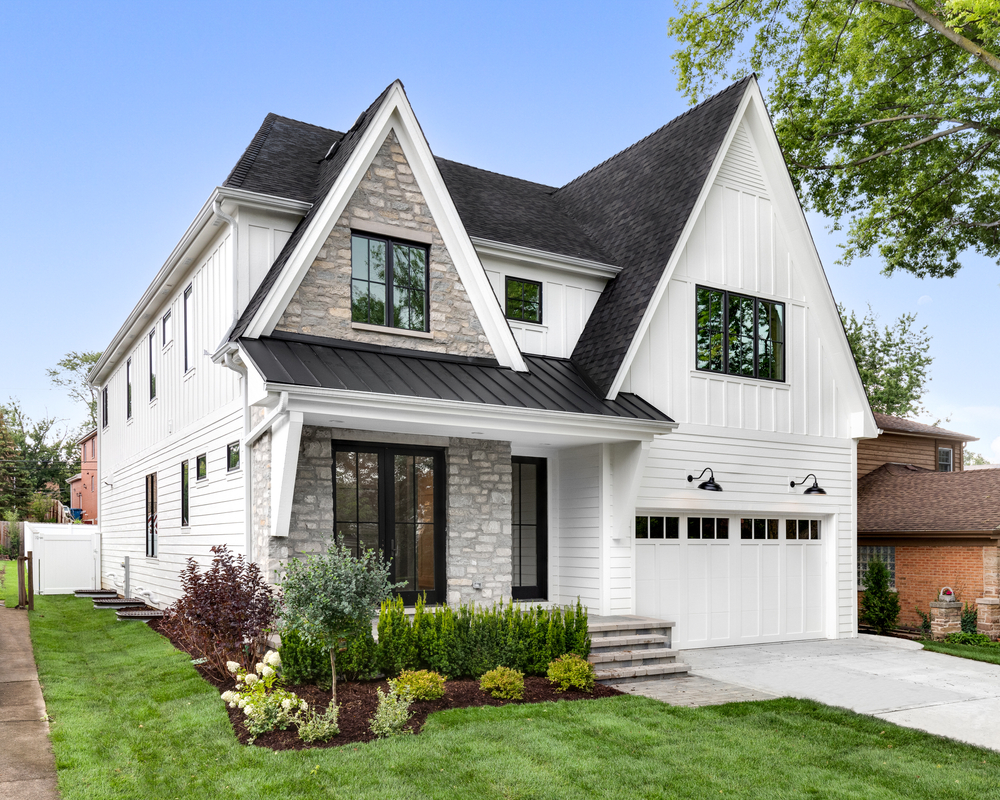
These symmetrical sconces contrast with the white of the house perfectly and add some visual interest. You could also add matching ones by your garage for even more light.

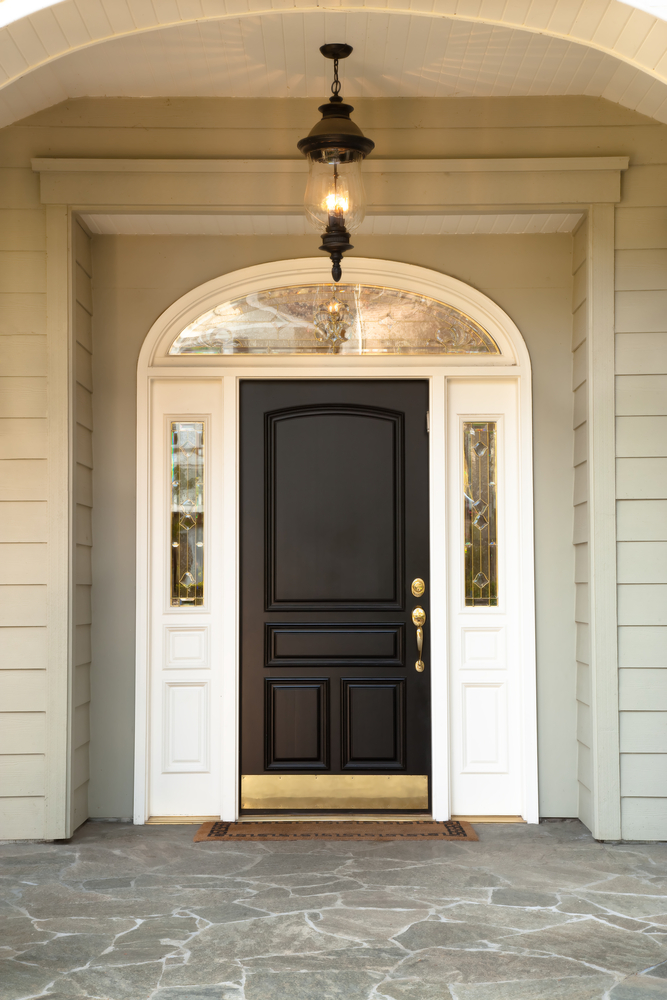
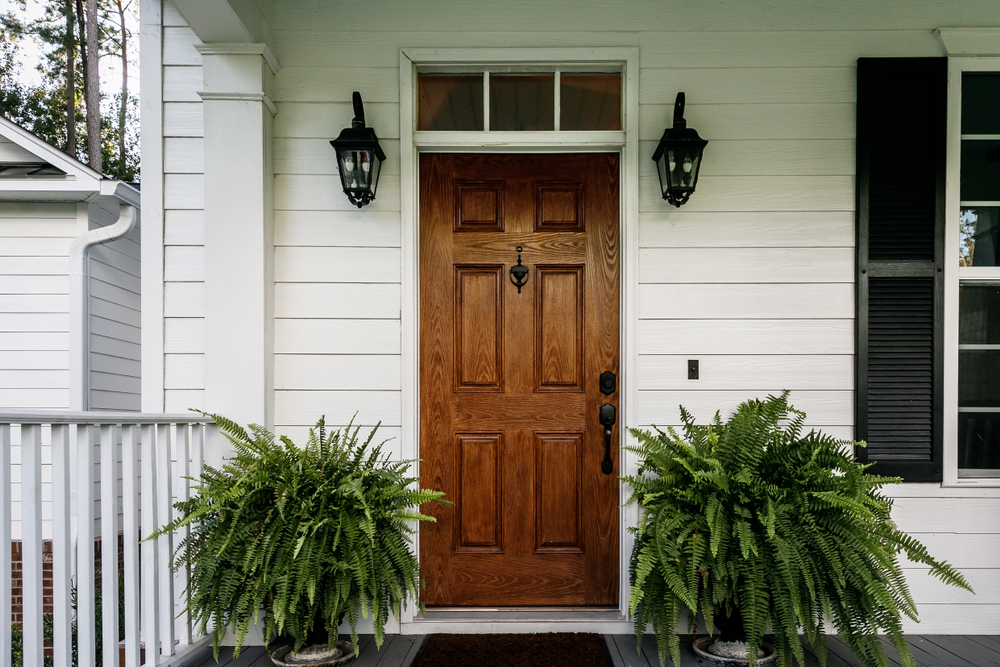
If you don’t have room for outdoor sconces, consider a pendant light like this one. It adds a perfect lighting focal point without distracting from your picture-perfect entryway.

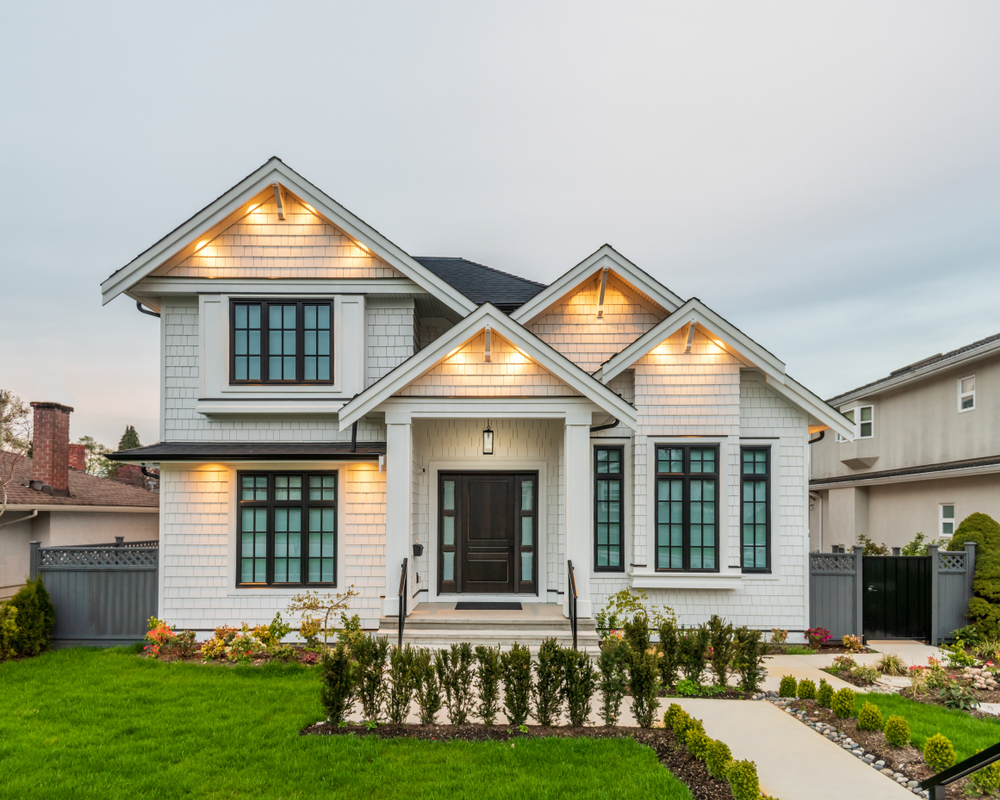
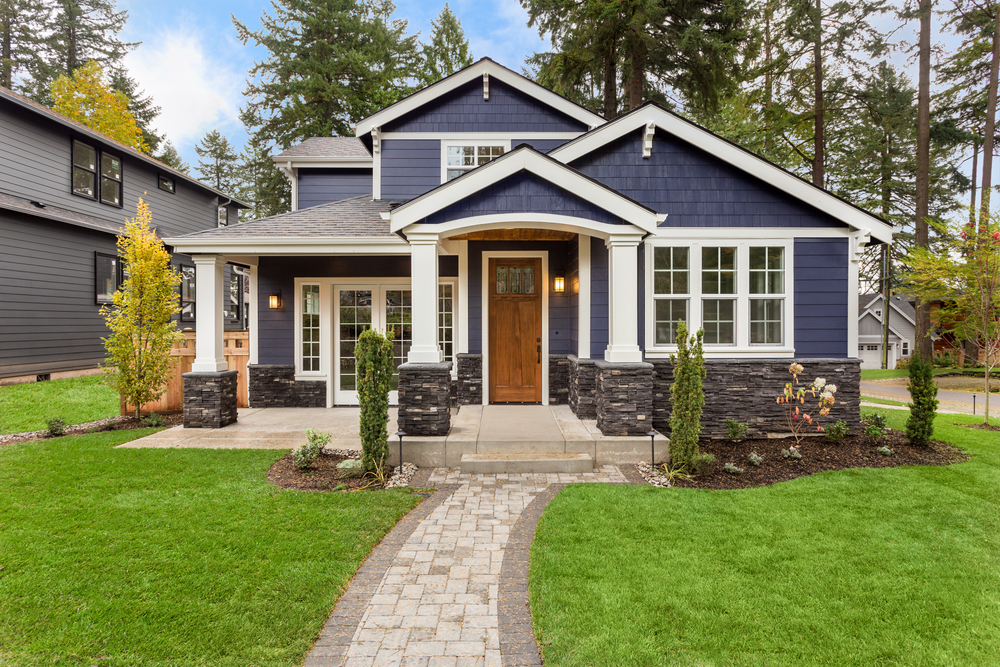
From top to bottom, this house will not be ignored! It draws your eyes toward it by using tons of lights. From the overhead light on the front porch to the lights under every roof overhang, you’ll see this beauty no matter where you are.

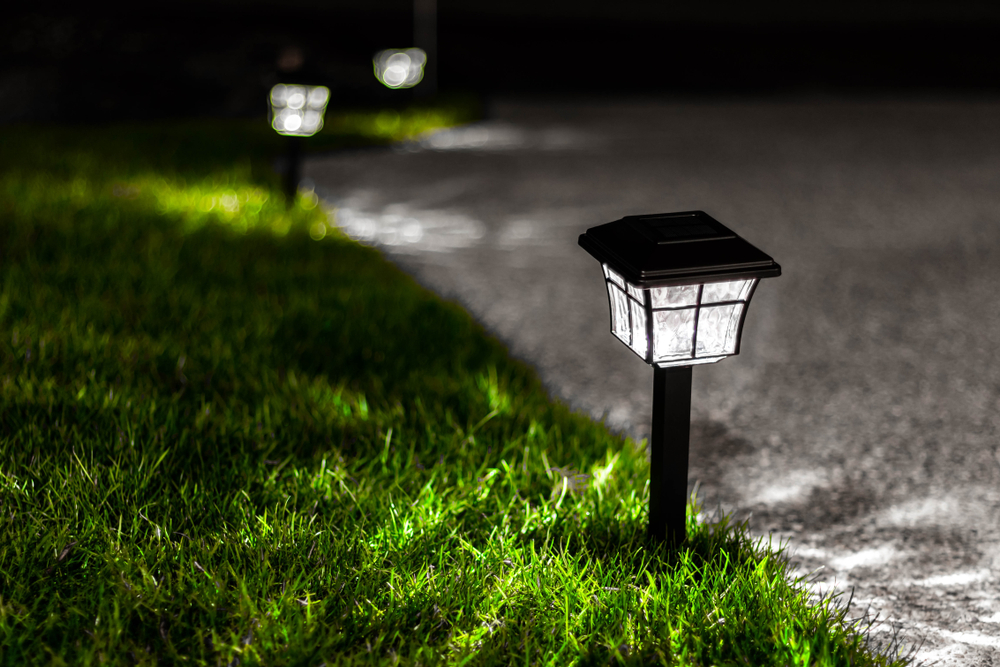
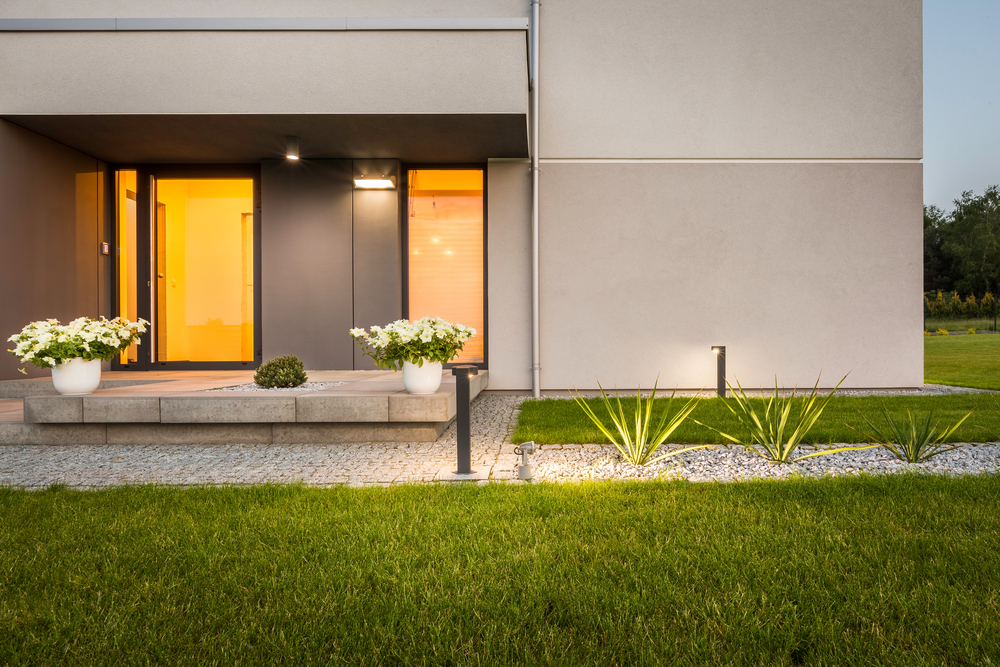
Add low-voltage outdoor lights or solar-powered lights to your driveway or walkway for a quick lighting upgrade. They’ll catch eyes, and guests won’t waste time looking for a path through your front yard.

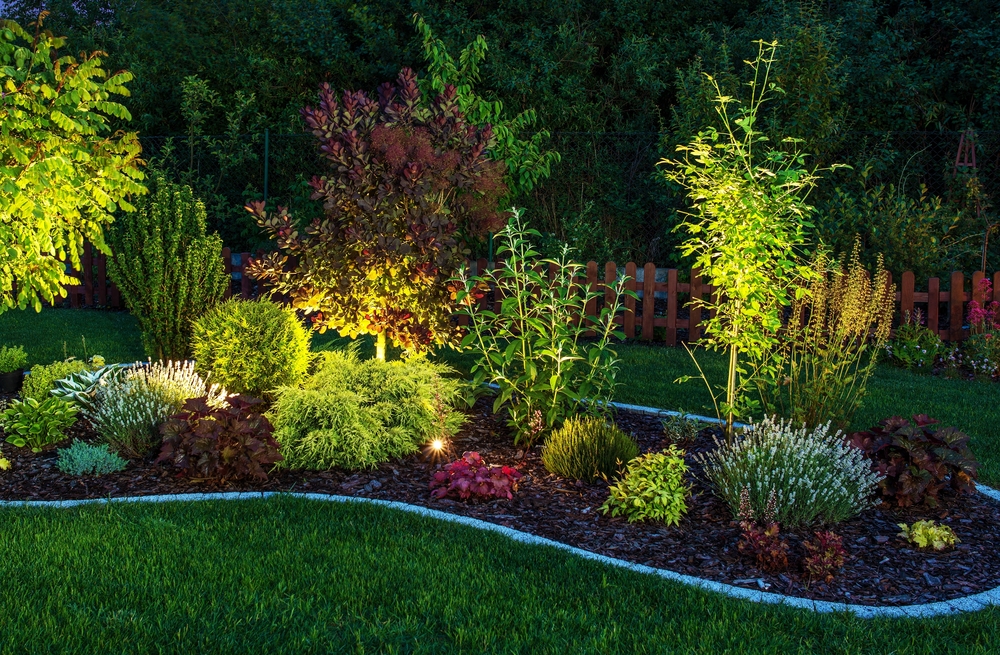
Landscape lighting like this puts an emphasis on your garden beds, flowers, or other plants. You’ve worked hard to maintain them, so make it count–day or night. 

Tip 2: Utilize Color

You can use color to create a focal point for your house. It doesn’t matter whether you use neutrals, contrasting colors, or pops of bright color; careful color selection can really create an inviting exterior.

Don’t be afraid to be bold! This aqua-colored door with a bright floral wreath immediately draws the eye and invites guests in. (Plus, check out that perfectly-placed pendant that will light up the door at night!)

When you’re looking to add bright color, flowers are a great way to go. These gorgeous window boxes add a much-needed pop of color without feeling committed to a paint color. For the DIYers – window boxes are a great little project you can throw together with your scrap wood!

Whatever color you go for, make sure your trim and siding complement each other. Update one or both, but don’t forget to give your house a good power wash!

If your garage is looking a little worn out, a fresh coat paint is a quick fix. This house’s garage matches the trim and contrasts against the white perfectly. 

Tip 3: Decorate, decorate, decorate!

One of the easiest (and least expensive) ways to increase your curb appeal is by adding some decorative items. It’s a great way to make your porch feel more like an extension of your home than just a set of concrete steps. 

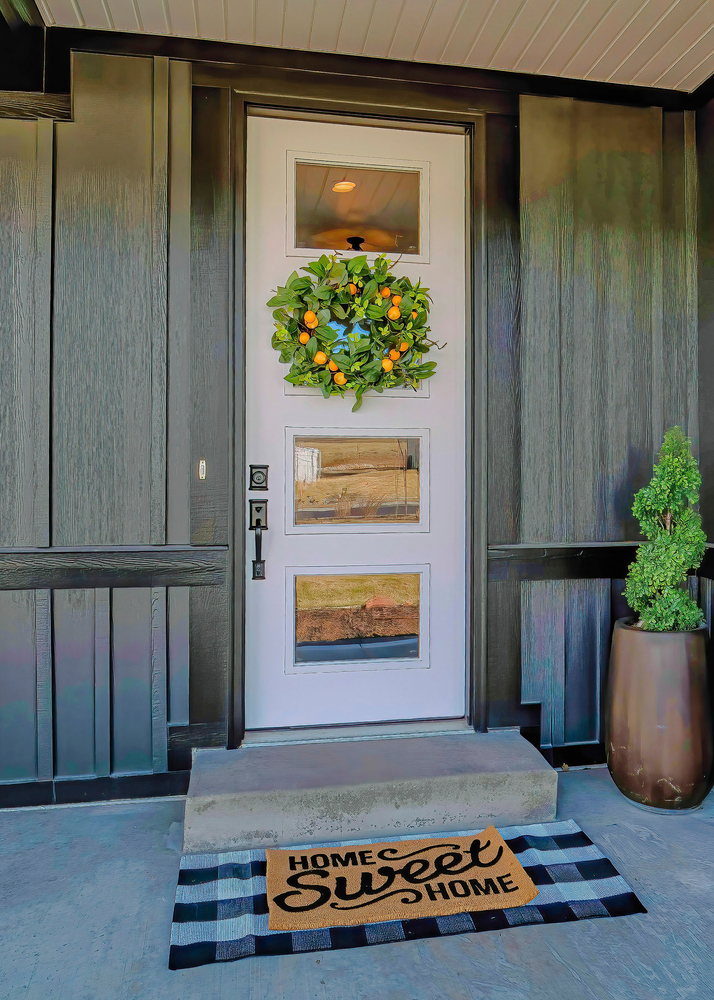
Decoration doesn’t have to be complicated. Add a simple wreath and cute doormat with an undermat to invite people in.

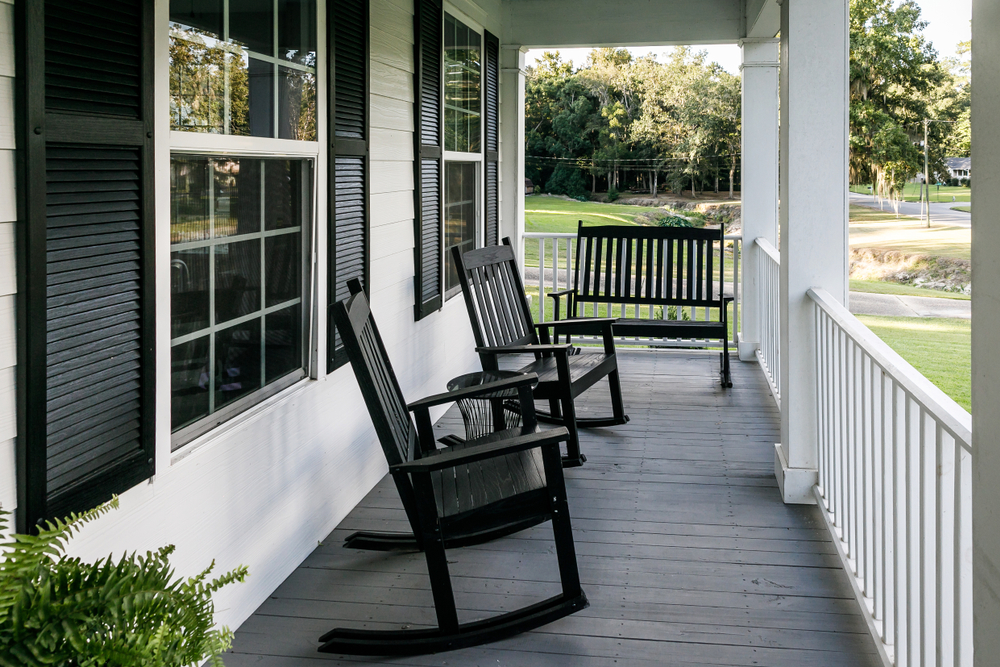
A front porch with furniture makes you feel right at home. Throw some chairs and a bench up for a cozy place to sit with your guests, or to watch your kids ride their bikes around the cul-de-sac. Pro tip: Add a few outdoor pillows for a pop of color! You’ll want to spend all summer outside and boost your curb appeal. Win-win!
Have you ever been looking for a house, but you can’t seem to find it? Your house numbers are an essential for guests trying to locate your house. If yours are feeling a little lackluster – changing them out is a very simple project with a big impact! This house’s numbers and door hardware match, pulling the look together. 

Shutters are a classic way to increase curb appeal. These shutters create some high-contrast visual interest by framing in the windows – and the symmetry pleasantly draws your eyes right up the path and straight to the front door.

Tip 4: Exercise Your Green Thumb

Landscaping is one of the first things you see when looking at a house. Is the lawn sickly and brown or thick and green? Are there bright flowers? Trees? You may not have a green thumb, but there are ways to make your yard and house stand out without getting (too) dirty.

Add some interest to your entryway with symmetrical pots next to your front door. Plant some easy-to-maintain flowers or greenery in them for a simple way to spruce up your front porch.

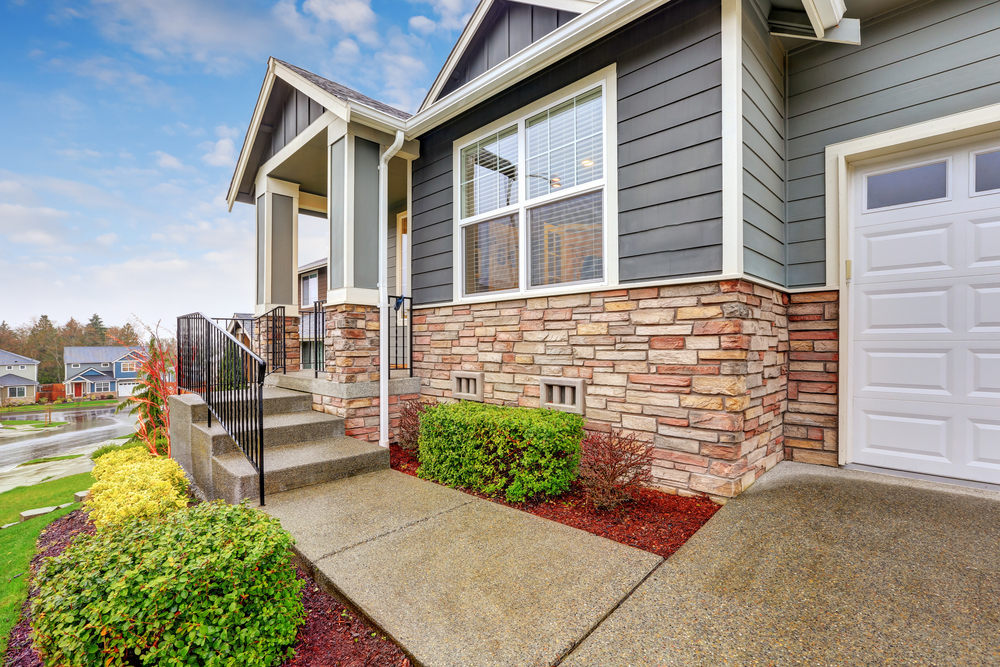
Update your garden beds with some plants and mulch. The contrast of the mulch in this house’s landscaping makes the greenery look lush and healthy. The depth of color helps the white paint on the house look bright and crisp, too. (Bonus points for the lights above the garage–we love the way they pop!)

If you’re a registered plant-killer, no need to fear! Pick low-maintenance plants that require little care – or take a look at getting some artificial outdoor plants. If you live in a place where water conservation is a concern, you can xeriscape (landscape with minimal water use) instead. Choose your plants mindfully, and your maintenance can be simple.

You could also consider planting less and adding lights to make what you do have pop (without all the hassle)!

Tip 5: Regular Maintenance

No matter what your house looks like, keeping it clean and dressed up will make a great impression. From state-of-the-art mansions to 50-year-old starter homes, regular maintenance will make any home look like a million bucks.

This house has clearly been well-cared for. The white is still white (not brown–yikes), the lawn is green and mowed, and the driveway is clear of yard waste. 

If you have pavement, make sure to get out your broom or leaf blower to clear it off! If you don’t, consider adding one. It creates a place to walk so your yard stays nice and creates a line for your eyes to follow up to the house. 

If you have limited time or resources, make sure to design your yard with maintenance in mind. Choose artificial plants or some that require little water. This house doesn’t have grass to mow, and the plants are low-maintenance.

Another tip to reduce maintenance is to use LED lights that don’t need to be replaced as often. Taking care of your house doesn’t have to take your entire weekend!

Curb appeal is what brings a smile to your face when you come home every day. It creates an atmosphere you’ll want to share with those you care about. Whether you’re trying to sell or just looking to impress your guests, updating your lighting, utilizing color, decorating, landscaping, and maintaining your house will make you feel at home and leave your guests with a first impression they won’t forget. Contact Hobrecht Lighting or visit our showroom for more tips on boosting your home’s curb appeal!

Filed Under: 2022, Architectural Lighting, Home & Garden, Life & Style, Outdoor, Outdoor Lights, Tips and Tricks

Outdoor Ceiling Fans- What You Need to Know

Outdoor Ceiling Fans- What You Need to Know

by admin · Jan 12, 2025

There’s no better way to spend warm summer days or nights than on your back porch with a cold beverage in hand – but what would make these carefree summer days even better? A cool breeze fanning your face. We’re talking outdoor ceiling fans.

Not only are outdoor fans ideal for keeping porches and patios cool, but they also add an element of style to your outdoor space. Whether you’re trying to keep your back patio cool as you grill in the heat, or give incoming guests a nice breeze as they knock on your front door, adding a ceiling fan will double in functionality and tie your space together.

Know What You’re Looking for in Outdoor Ceiling Fans 

When it comes to an outdoor ceiling fan, there are a few components to be mindful of – what it means to be wet-rated, whether the finish is able to withstand harsh weather conditions, the variation in blade speeds, and of course, the aesthetic. Here, we want to break it down and help you choose one of the best outdoor ceiling fans for your space.

Is the Fan Wet-Rated?

Backyard patio with two outdoor ceiling fans and a pool and tropical trees in the background

There’s an important difference between indoor and outdoor ceiling fans – that being whether they’re waterproof or not. While they may look alike, indoor and outdoor ceiling fans aren’t simply interchangeable. All ceiling fans have “ratings” based on their intended location. If they’re dry-rated, they should always be placed indoors, and if wet- or damp-rated, these ceiling fans can be used both indoors and outdoors.

It’s essential to look for outdoor ceiling fans that are wet rated because they’re able to withstand harsh weather conditions. If a fan is wet-rated, it can handle ice, snow, severe rain, and ocean spray (if you live near a beach). We recommend using a wet-rated ceiling fan on your exposed deck, veranda, gazebo, or pergola – all of which will look nice with the added accessory. Check out one of our favorite wet-rated fans here. 

Choose a Finish that Also Withstands Harsh Weather Conditions

A beautiful backdrop of  a backyard patio with outdoor furniture and city lights in the background

For safety reasons, it’s obviously imperative you choose a wet-rated ceiling fan, but you also want to focus on choosing a finish that can hold its own. Whether you’re browsing for large outdoor ceiling fans or small outdoor ceiling fans, don’t let your money slip down the drain by landing a finish that gets ruined after one rainstorm. We want you to find your dream ceiling fan designed to last. 

We recommend choosing a model built with highly tempered, resilient steel paired with durable wood that’s been stained and treated to withstand weather elements. Take this wet location rated ceiling fan for example; it’s designed for both indoors and outdoors with a finish guaranteed to last.

How Does it Look in Your Intended Space?

20740731 – neutral outdoor room with cane furniture

Let’s not forget the overall look! You’ve worked hard to give your backyard patio or front porch a calming feel and charming look, so don’t forget to choose an outdoor ceiling fan that speaks to your style. 

If you live in a tropical climate, perhaps you’re after the “palm leaf” blade look. If your backyard pad is modern and sleek, you can easily find minimally striking ceiling fans. Or, if you’re a traditionalist, you can find the best outdoor ceiling fans to pair with that old-timey feel of sipping an iced tea with your loved ones on the front porch. As long as your outdoor ceiling fan is wet-rated, the stylistic possibilities are endless. 

Transform Your Outdoor Space and SAVE with Our Selection of Lighting Products

To give your outdoor space that finishing touch (one that’s functional, too), choose an outdoor ceiling fan that speaks to you. To steer you in the right direction, we have an irresistible deal on Hobrecht Lighting outdoor ceiling fans! 

Filed Under: Ceiling Fans, Outdoor Lights, Styles & Trends

5 Easy Steps to Create a Modern Minimalist Interior

5 Easy Steps to Create a Modern Minimalist Interior

by admin · Nov 17, 2024

With an intentional lack of furniture and decorations, minimalist design can sometimes come off as cold and uncomfortable. Over the past few years, as we’ve spent more time in our homes than ever before, the need for comfort in a home design has been made crystal clear.

Today’s modern minimalism prioritizes simplicity with a decluttered and uncomplicated aesthetic, while also emphasizing the need for comfort in a space. You’ll see more color and accessories than the minimalist interiors of the past had, but they’ll be thoughtfully chosen extras that provide warmth and life to the space without going overboard. 

Whether you’re interested in adopting a minimalist lifestyle or just love the simple yet dramatic design aesthetic, modern minimalism is an achievable aesthetic for just about anyone! 

To help you get started, we broke down the basics of modern minimalist interior design into a handful of easy steps you can use to confidently focus on the right essentials. 

1. Create an Open Floor Plan

Focus on creating as much connected open space as possible. Obviously, taking out walls is the easiest way to create an open floor plan. But if you’re not in a place where you can tear down walls, there are some simple and subtle tricks you can use to make adjoining spaces feel more connected. 

One way to connect spaces in your home is to use the same flooring and wall paint colors for the entire space. This will make rooms look like they belong together, even through a doorway. 

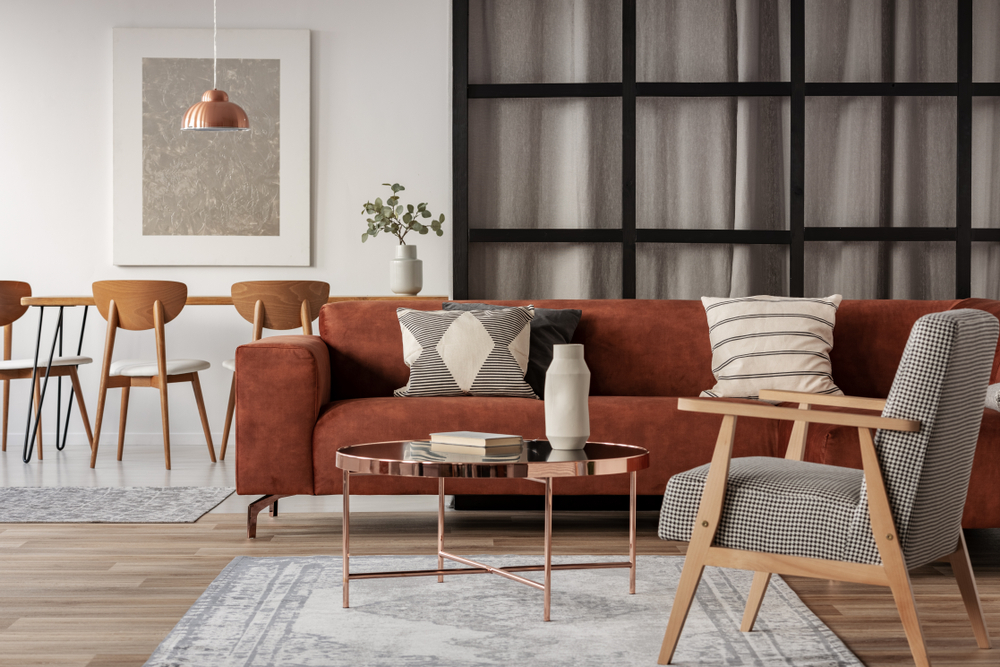
A unique accent, like this minimalist pendant light, grabs your attention through the doorway from across the way, which helps your brain perceive the two spaces as one.

Finally, play around with your furniture placement to maximize your space. In smaller spaces, this often means keeping large furniture close to the walls to keep open pathways throughout but don’t underestimate the power of a simple, low-profile, floating sofa used to define a space.

2. Choose a Small Color Palette

A classic hallmark of minimalist design is a neutral monochromatic color palette, typically in warm grey, white, or beige tones. Contrast is important – add dimension and balance with a mix of darker and lighter shades within your color palette.

If an all-neutral color palette just isn’t your thing, you can still get a modern minimalist look with color – you just need to stick to a small palette. Keep most of the colors you use very light, to increase the feeling of airiness and reflect light best. 

3. Functional Design is Key

It doesn’t matter how pretty a room is, if it’s inconvenient or difficult to use you’re not going to be happy with it. When you’re trying to adopt modern minimalism, understanding how to pare down to only the essentials can be hard. When you’re going through your room, ask yourself:

 “Does this serve a purpose?”   “Do I already have something that serves this purpose?”   “Is there a multipurpose option that will serve this purpose and others?” 

Just remember, there’s no hard and fast rule for what it means to be “functional” – and you don’t need to justify every item you love to keep it in your home. A funky decorative pillow that makes you smile when you see it is serving a purpose (and it’s making your couch more comfortable – so it’s multifunctional!) 

A huge part of functional design is organization. Decluttering for a modern minimalist space involves reducing “visual clutter” too! Things not actively being used should have a home where they can be tucked away until they’re needed. 

Opt for storage options that have doors that will hide the things you’re not using.  When styling open shelving, choose items that match your color palette, leave plenty of open space, and use boxes or baskets to organize and hide loose items.

Don’t be surprised if you get down to the basics and you aren’t in love with what you have left. You’ll likely need to start making smart trades here and there to end up with a set of basics that you love.

4. Add Light – Lots of It

Like most modern design aesthetics, modern minimalism focuses on filling the space with light. Where possible, introduce as much natural light as you can. The light colors on your walls and floors will reflect it – making your room feel open and airy. 

In addition to natural light, a modern minimalist space needs a well-thought-out interior lightscape. Make sure your general ambient light is bright without being harsh, and add extra lighting in dark corners and over workspaces. Hidden lights, like LED strips under a cabinet, are an inexpensive DIY trick with a big payoff! 

Because minimalism is all about doing less with more, it’s okay to be choosy about how you add light to your space – you don’t want to clutter up your home with a floor lamp in every dark spot! When you’re shopping for fixtures, stick to simple shapes that can double as design elements.

5. Finish it Off with Thoughtful Accents

Little pops of color and texture are what take a modern minimalist space from blah to wow. You can do this in a number of ways, but remember to keep it simple. Start with just one color or texture and see how it feels before committing to more. 

When possible, look for ways to upgrade your existing decor rather than adding extra items. Look for functional pieces that you need in your space, but feel a little lackluster, and find a more interesting alternative. Replace an old, overstuffed sofa with a simpler version in a deep color (as long as it’s in your color palette!) or give an old end table new life with a coat of paint.

Pro Tip: If you have a hard time committing to color, consider using houseplants! They introduce a vibrant green color and soft, organic textures, which can balance out a minimalist design quite nicely.

By far, one of the most effective ways to accent a modern minimalist design is with an interesting light fixture. Your room will always need light, so it might as well be an integrated part of the design! 

A stunning ceiling light with a simple shape will stand out as a piece of art against a minimalist backdrop and elevate the entire design of the space. 

Pendant lamps are popular in modern minimalist design because they come in simple shapes with lots of finish options, so it’s easy to find something that will match your aesthetic. 

If replacing a ceiling fixture isn’t an option, you can get a similar impact with a carefully chosen floor lamp! Lamps are the MVP of accent lighting for a reason – they’re easy to move, replace, and rearrange, and come in a HUGE variety of styles. You can go for something small that blends in, but we also love the way a large, yet simple, lamp like this one makes a statement without taking over. 

That’s all there is to it! Just to recap, here are the 5 easy steps to create a modern minimalist interior: 

  1. Create an open floor plan – Tie separate spaces together with color and materials and rearrange furniture to maximize your space.
  2. Choose a small color palette – Neutrals are your friend, but it’s okay to add in a little bit of color to make your space feel like you.
  3. Remember functionality – Use multipurpose furniture, and organize, organize, organize. Store things that aren’t being used so that they’re not cluttering up your space.
  4. Add light – Having lots of natural and indoor lighting is what makes your space feel open and airy. Light up dark corners and workspaces.
  5. Finish it off with thoughtful accents – Don’t over-accessorize. Pops of color and texture give life to a space, but try to incorporate these add-ons with the functional elements of your space – like a colored sofa or an upgraded light fixture.

——–

Modern minimalist design can be a difficult concept to balance, but it’s very forgiving and so beautiful when done correctly. If you need help finding the right lighting for your modern minimalist home, our experts at Hobrecht Lighting can help!

Filed Under: 2022, Decor & Home Accents, Life & Style, Styles & Trends, Styles and Trends

9 Mind-Blowing Uses for LED Strip Lights

9 Mind-Blowing Uses for LED Strip Lights

by admin · Nov 10, 2024

If you’re looking to add some atmosphere or a little more “IT” factor to your living spaces, new and ultra-versatile LED strip lighting may be the perfect thing for you. Sized smaller than your pinky finger and capable of infinite adjustments in color, length, lumens, and voltage, LED strip lights like these can hide, and transform, just about any space you can imagine.

As a general rule, LEDs at 3000 kelvins (the ranking for light color) feel warm, cozy, and atmospheric, making them preferable for residential uses. These LED strip lights can transform virtually any space, so long as they can still connect to a power source. Ready for some of our favorite examples?

1. Kitchen Cabinets

Use LED strip lights under cabinets as trendy task lighting. It’ll illuminate your counters and your beloved backsplash. For extra pizzazz, add a strip under your bottom cabinets as well—it’ll add more dimension to your room and give you several good options for night lighting!

2. Hallways and Bookshelves

For some subtle lighting in the hallway, apply the strip lighting under the trim piece that is dropped from the ceiling. As for bookshelves, line them inside, under, or above shelves to dress then t up and make them extra inviting. 

3. Artwork

In addition to spotlights or general lighting, lining the back or sides of a frame really makes artwork pop!

4. Master Bedroom

LED strip lights are a low-cost way to bring some soft mood lighting to your most relaxing space. Line them along your headboard, around artwork, or bordering your doors.

5. Night Light

Use a similar trick for small children up to teens, turning strip lighting into a fashionable, functional nightlight.

6. Bathrooms

Add LED’s behind your bathroom mirror for an extra glow, or consider one of their most functional uses ever—under the cabinet lighting! Prevent middle-of-the-night toe injuries by using subtle strip lights to illuminate the space. 

7. Stairs

For extra convenience and safety, LED’s fit on the underside of a hand rail for night-time access or under the lip of each step. Say goodbye to stubbed toes and awkward stumbling!

8. Mirrors

Hanging mirrors have a gap that provides easy access for LED’s! You’ll love the extra task lighting for shaving, applying makeup, or just getting a good view with that extra glow.

9. Outside

So many great uses here! LED strips add some atmosphere to any patio, pool ledge, or pergola.  Line outdoor pathways or stairs with these tiny lights and enjoy their practical side as well.

If you’re feeling excited by these possibilities, reach out to us to learn more! As your local lighting showroom, we know the ins and outs of quality, affordable lighting in all shapes and sizes. Hobrecht Lighting is here for all your project needs!

Filed Under: LED Lights, Styles & Trends

5 Easy Steps to Create a Modern Minimalist Interior

5 Easy Steps to Create a Modern Minimalist Interior

by admin · Nov 3, 2024

With an intentional lack of furniture and decorations, minimalist design can sometimes come off as cold and uncomfortable. Over the past few years, as we’ve spent more time in our homes than ever before, the need for comfort in a home design has been made crystal clear.


Today’s modern minimalism prioritizes simplicity with a decluttered and uncomplicated aesthetic, while also emphasizing the need for comfort in a space. You’ll see more color and accessories than the minimalist interiors of the past had, but they’ll be thoughtfully chosen extras that provide warmth and life to the space without going overboard. 

Whether you’re interested in adopting a minimalist lifestyle or just love the simple yet dramatic design aesthetic, modern minimalism is an achievable aesthetic for just about anyone! 


To help you get started, we broke down the basics of modern minimalist interior design into a handful of easy steps you can use to confidently focus on the right essentials. 


1. Create an Open Floor Plan

Focus on creating as much connected open space as possible. Obviously, taking out walls is the easiest way to create an open floor plan. But if you’re not in a place where you can tear down walls, there are some simple and subtle tricks you can use to make adjoining spaces feel more connected. 


One way to connect spaces in your home is to use the same flooring and wall paint colors for the entire space. This will make rooms look like they belong together, even through a doorway. 

A unique accent, like this minimalist pendant light, grabs your attention through the doorway from across the way, which helps your brain perceive the two spaces as one.

Finally, play around with your furniture placement to maximize your space. In smaller spaces, this often means keeping large furniture close to the walls to keep open pathways throughout but don’t underestimate the power of a simple, low-profile, floating sofa used to define a space.

2. Choose a Small Color Palette

A classic hallmark of minimalist design is a neutral monochromatic color palette, typically in warm grey, white, or beige tones. Contrast is important – add dimension and balance with a mix of darker and lighter shades within your color palette.

If an all-neutral color palette just isn’t your thing, you can still get a modern minimalist look with color – you just need to stick to a small palette. Keep most of the colors you use very light, to increase the feeling of airiness and reflect light best. 

3. Functional Design is Key

It doesn’t matter how pretty a room is, if it’s inconvenient or difficult to use you’re not going to be happy with it. When you’re trying to adopt modern minimalism, understanding how to pare down to only the essentials can be hard. When you’re going through your room, ask yourself:


 “Does this serve a purpose?”   “Do I already have something that serves this purpose?”   “Is there a multipurpose option that will serve this purpose and others?” 

Just remember, there’s no hard and fast rule for what it means to be “functional” – and you don’t need to justify every item you love to keep it in your home. A funky decorative pillow that makes you smile when you see it is serving a purpose (and it’s making your couch more comfortable – so it’s multifunctional!) 

A huge part of functional design is organization. Decluttering for a modern minimalist space involves reducing “visual clutter” too! Things not actively being used should have a home where they can be tucked away until they’re needed. 


Opt for storage options that have doors that will hide the things you’re not using.  When styling open shelving, choose items that match your color palette, leave plenty of open space, and use boxes or baskets to organize and hide loose items.

Don’t be surprised if you get down to the basics and you aren’t in love with what you have left. You’ll likely need to start making smart trades here and there to end up with a set of basics that you love.

4. Add Light – Lots of It

Like most modern design aesthetics, modern minimalism focuses on filling the space with light. Where possible, introduce as much natural light as you can. The light colors on your walls and floors will reflect it – making your room feel open and airy. 

In addition to natural light, a modern minimalist space needs a well-thought-out interior lightscape. Make sure your general ambient light is bright without being harsh, and add extra lighting in dark corners and over workspaces. Hidden lights, like LED strips under a cabinet, are an expensive DIY trick with a big payoff! 

Because minimalism is all about doing less with more, it’s okay to be choosy about how you add light to your space – you don’t want to clutter up your home with a floor lamp in every dark spot! When you’re shopping for fixtures, stick to simple shapes that can double as design elements.

5. Finish it Off With Thoughtful Accents

Little pops of color and texture are what take a modern minimalist space from blah to wow. You can do this in a number of ways, but remember to keep it simple. Start with just one color or texture and see how it feels before committing to more. 


When possible, look for ways to upgrade your existing decor rather than adding extra items. Look for functional pieces that you need in your space, but feel a little lackluster, and find a more interesting alternative. Replace an old, overstuffed sofa with a simpler version in a deep color (as long as it’s in your color palette!), or give an old end table new life with a coat of paint.

Pro Tip: If have a hard time committing to color, consider using houseplants! They introduce a vibrant green color and soft, organic textures, which can balance out a minimalist design quite nicely.

By far, one of the most effective ways to accent a modern minimalist design is with an interesting light fixture. Your room will always need light, so it might as well be an integrated part of the design! 


A stunning ceiling light with a simple shape will stand out as a piece of art against a minimalist backdrop and elevate the entire design of the space. 

Pendant lamps are popular in modern minimalist design because they come in simple shapes with lots of finish options, so it’s easy to find something that will match your aesthetic. 

If replacing a ceiling fixture isn’t an option, you can get a similar impact with a carefully chosen floor lamp! Lamps are the MVP of accent lighting for a reason – they’re easy to move, replace, and rearrange, and come in a HUGE variety of styles. You can go for something small that blends in, but we also love the way a large, yet simple, lamp like this one makes a statement without taking over. 

That’s all there is to it! Just to recap, here are the 5 Easy Steps to Create a Modern Minimalist Interior: 


  1. Create an open floor plan – tie separate spaces together with color and materials, and rearrange furniture to maximize your space.
  2. Choose a small color palette – neutrals are your friend, but it’s okay to add in a little bit of color to make your space feel like you.
  3. Functional design is key – use multipurpose furniture, and organize, organize, organize. Store things that aren’t being used so that they’re not cluttering up your space.
  4. Add light – having lots of natural and indoor lighting is what makes your space feel open and airy. Light up dark corners and workspaces.
  5. Finish it off with thoughtful accents – Don’t over-accessorize. Pops of color and texture give life to a space, but try to incorporate these add-ons with the functional elements of your space – like a colored sofa or an upgraded light fixture.


——–


Modern Minimalist design can be a difficult concept to balance, but it’s very forgiving and so beautiful when done correctly. If you need help finding the right lighting for your Modern Minimalist home, the experts at Hobrecht Lighting can help!

Filed Under: 2022, Decor & Home Accents, Styles & Trends, Styles and Trends

How to Choose the Right Bathroom Vanity Lighting

How to Choose the Right Bathroom Vanity Lighting

by admin · Oct 27, 2024

When done right, your bathroom lighting should be able to take you from a bright morning routine to an evening spa break to a midnight trip to the restroom without feeling too over or underpowered in any scenario.

Most builder-grade vanity lights just don’t cut it. They’re often too high, too bright or dim, and don’t really add much to the design of your bathroom. So if you’re ready to try something new, we’ve compiled a list of the most common vanity light fixtures to help you figure out precisely what you (and your bathroom routine) need to create the bathroom oasis you deserve. 

Here is a short list of light fixtures and bulbs to consider so that you’ll be prepared to balance the functionality and style according to your budget and available space.

Types of Vanity Light Fixtures

Your bathroom vanity includes the mirror, counter, sink, and surrounding lighting. Vanity lighting is often the only source of light in the bathroom – and it largely determines your experience there. So it’s important to get it right!

There are several types of vanity light fixtures, each with its own set of benefits. Which one you choose is up to you – but make sure you consider both style and function to make sure you’re happy with the result.

Vanity Light Bar 

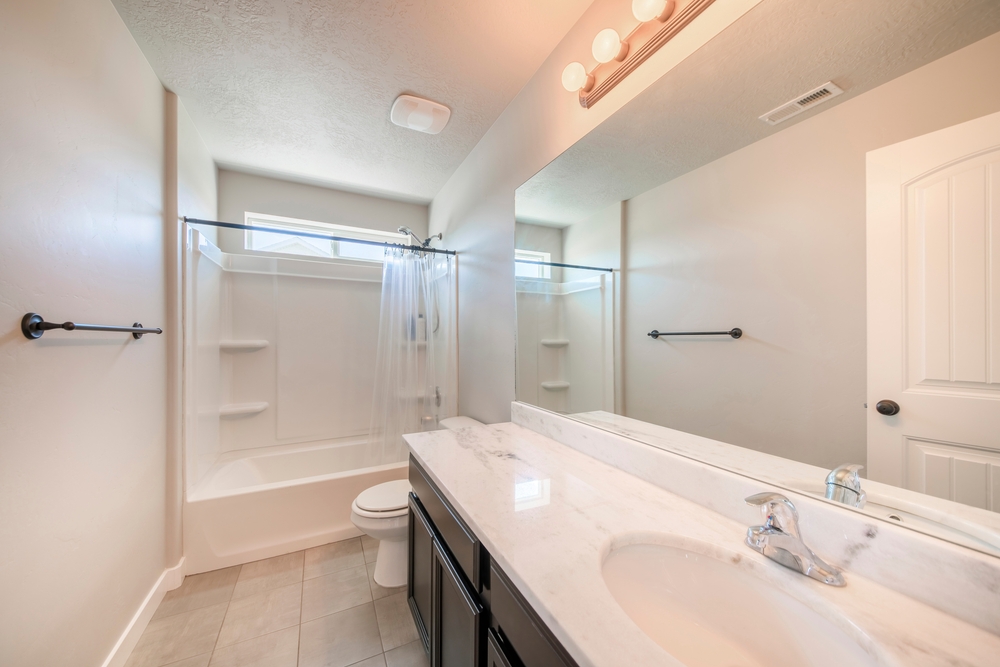
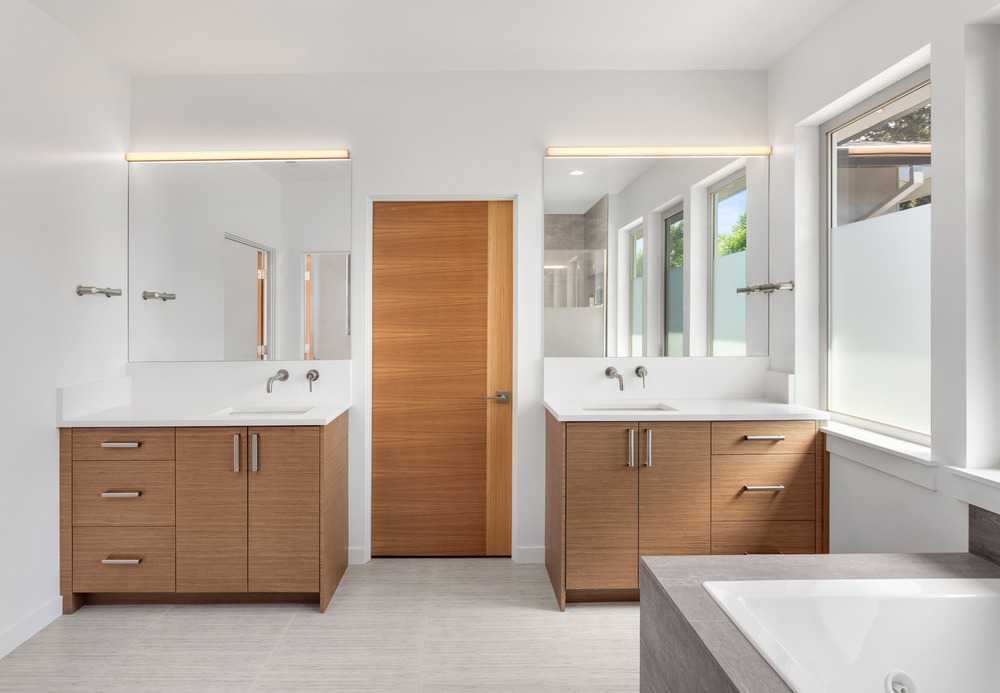
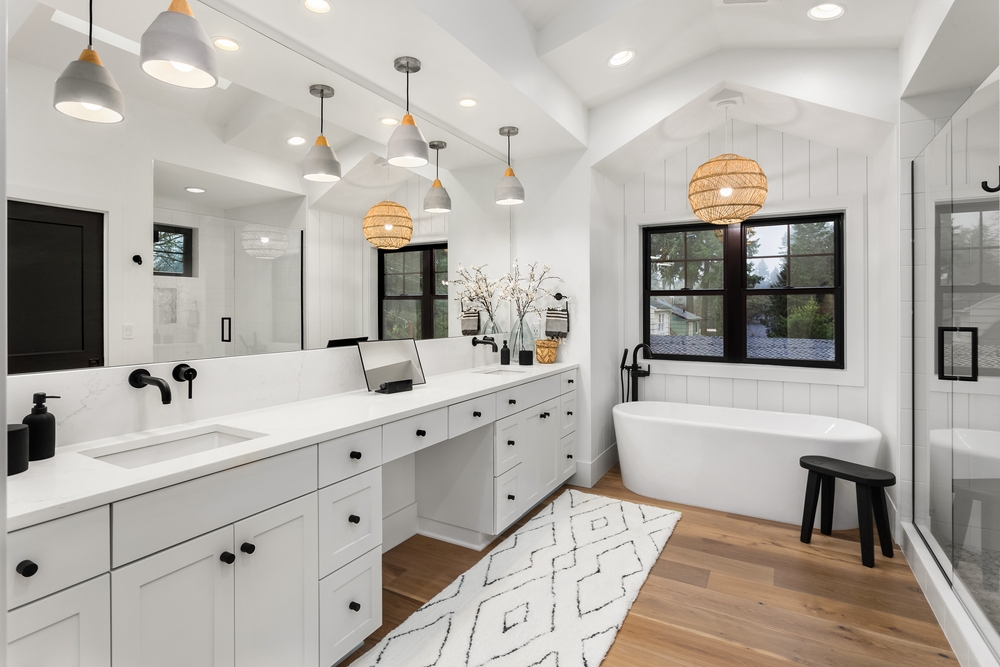
Light bars are the most common fixture for bathroom vanities because they’re easy to install and give off a lot of light. Light bars consist of a long base (the bar) with light emanating from its entire length. They’re usually mounted just above the mirror from a single, central wiring box. 

Most people picture a base with multiple bulbs sticking out into the room, like you’d see in a “builder’s grade” new home or surrounding the mirror in a makeup artist’s studio. Other light bars consist of a single, long light source, such as a sleek LED bar or a fluorescent tube. 

The advantage to installing light bars is that they create even lighting with fewer shadows. (Anyone who’s ever done makeup or shaved using a bathroom mirror knows how important that is!)

Pro tip: The most crucial part of successfully using a light bar is getting the proper proportions. Ensure the bar is at least 75% the mirror’s width and never longer than the counter below. Keeping the bar at least 6-6.5 ft high will give even light without shining directly into your eyes. 

Mirror-framing Sconces 

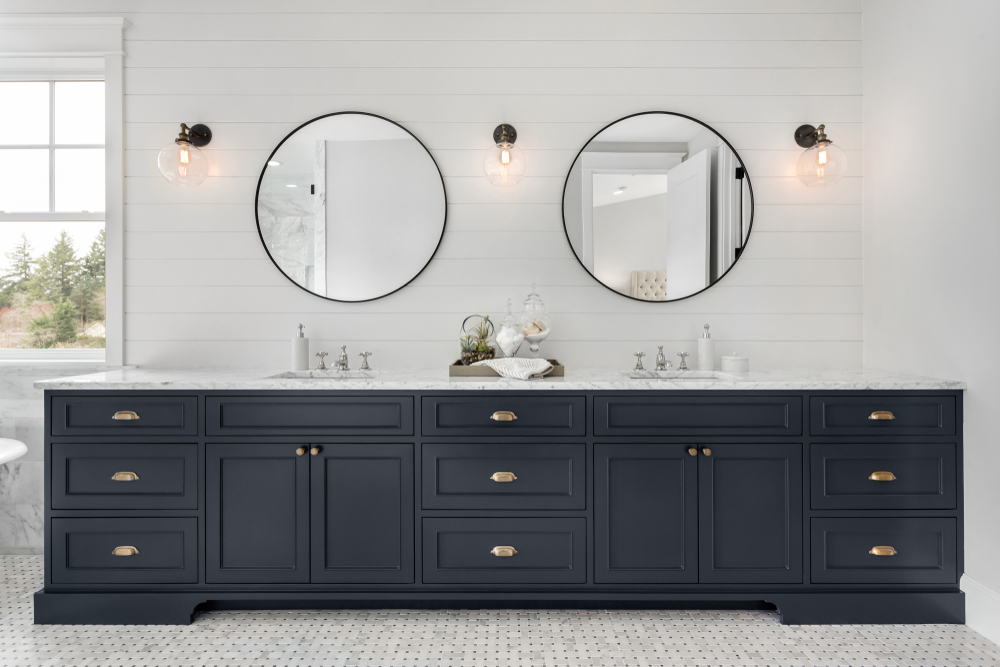
Sconces are light fixtures that attach to the wall rather than the ceiling. They’re often found above the center of the mirror, although it’s worth considering placing your sconces on either side of the mirror– you’ll get the best light for your morning routine and playfully break from tradition! 

The number of bulbs and types of shades will impact your placement. Some shades only allow for downward light, so those work best up high. Glass shades are a little more forgiving – they’ll shine light on your face when installed above or to the side of the mirror. 

Not only are sconces an excellent fit for lighting your vanity, but they also make a statement. You’ll show that you put real thought into your bathroom design by using a non-traditional fixture.

Pro tip: We recommend mounting sconces with the center of the fixtures about 60″ high and about 28″ apart. Try installing one on either side of your mirror to get even, shadow-free light on your face as you’re getting ready.

Unexpected Pendants

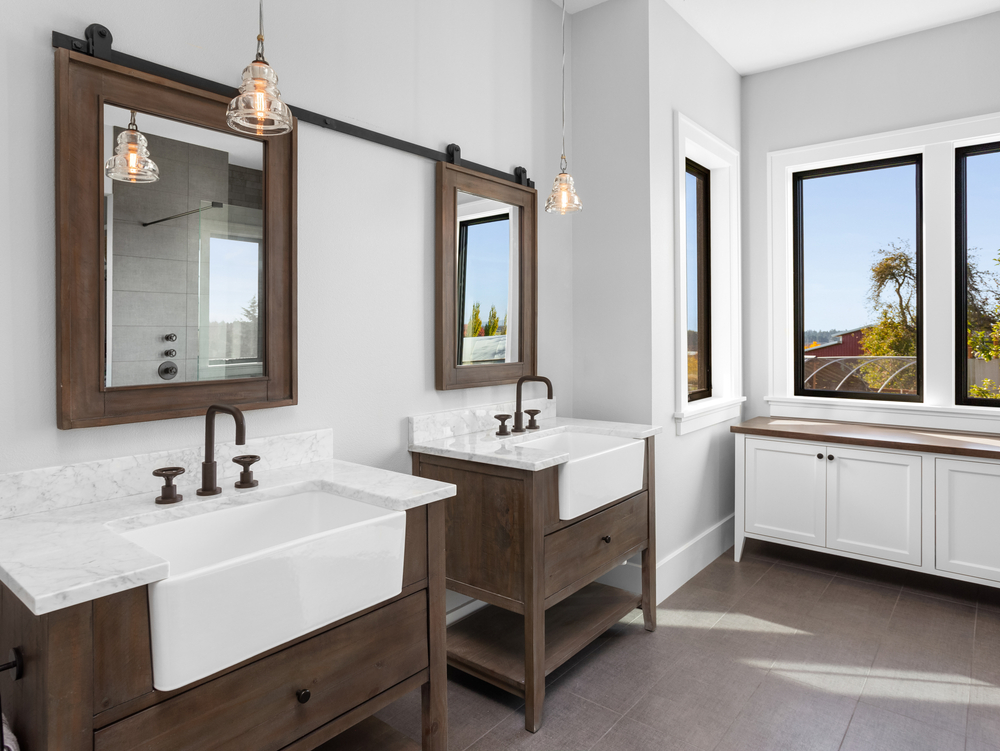
If you’re looking for a way to make your bathroom look unique, try out pendant lighting. These fixtures hang directly from the ceiling, with the bottom of the shade right above eye level. Not only are pendants a bold statement, but they’re also a versatile option if you’re short on space.

In a bathroom, sconce and pendant placement guidelines are very similar. A single pendant directly over the mirror is an excellent option for small bathrooms. They also work well as a pair, framing the mirror on either side. 

Because pendants have an extra “wow” factor, they’re also sometimes used in larger groups to create a design element. For example, this designer hung multiple pendants along the mirror – and we think it turned out great!

Pro Tip: We recommend spacing your pendants about 30 inches apart to avoid harsh lighting. Also, keep in mind the pendant’s ability to shine directly onto the mirror– a thin or transparent shade will reflect a lot of light. It’s a good trick to make your space feel brighter but may cast unexpected shadows.

Modernize with LEDs

For a modern (and energy-efficient) touch, consider opting for LED lights. They last for years, cost little to run, and come in a wide variety of color options.  LED light bulbs can be installed in almost any fixture in place of a traditional bulb.

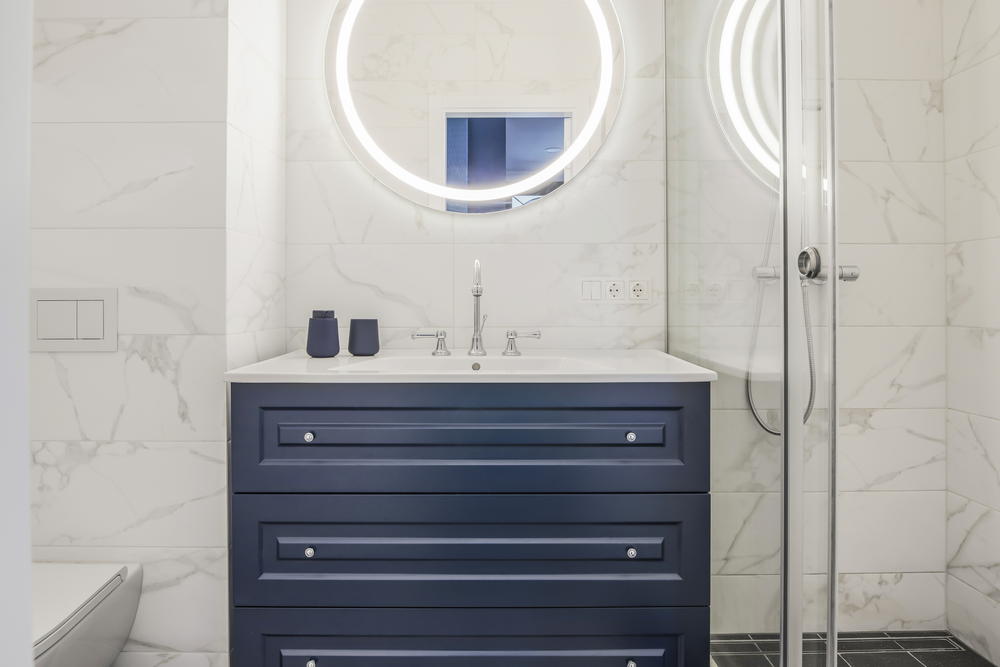
Some light fixtures come with LED lights already integrated, which means you’ll never have to change a bulb for the life of the fixture. While these mirrors come in a variety of styles, they’re most often found in sleek, modern bathrooms with a minimalist feel. 

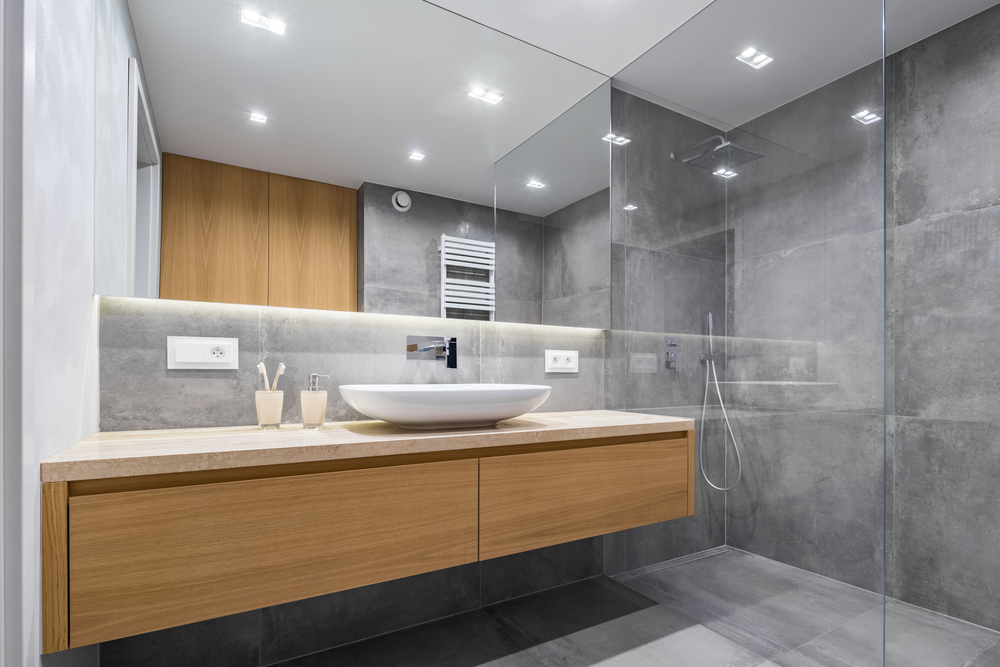
LED strip lights may be an unexpected choice for the bathroom. They’re easy to install (some are even peel-and-stick!) and will make your bathroom feel high-end with just a little bit of creativity. As vanity lighting, try installing them behind a mirror to give a soft, luxurious glow. 

Pro tip: Because they are so small, LED strip lights can be tucked in unexpected places, like along the underside of a mirror to light the counter, or along the bottom of a floating vanity to light the space underneath. Adding light to dimly-lit edges and corners of your bathroom will make it feel bigger!

When to Hire a Pro

If you own a newer home and have tools handy, you can probably handle most light fixture upgrades yourself. But not all fixture update projects are created equal. For example, you may have an older home that requires electrical updates, don’t own tools, need new circuits for new fixture locations, or simply don’t feel comfortable with an electrical project. 

Electricians will ensure your new fixture is installed quickly and safely. Not sure how to hire a qualified electrician? No problem! Your local lighting showroom can often connect you to a great pick– and offer a wider selection of fixtures while you’re there!

Ready to update your bathroom vanity? The experts at Hobrecht Lighting can help you find the right fixture for your room, budget, and style. Contact us today!

Filed Under: 2022, Bathroom, Bathroom Lights

Next Page »

Copyright © 2025