• Skip to primary navigation
  • Skip to main content

Hobrecht Lighting

  • Buying Guides
  • Styles & Trends
    • Bathroom Lights
    • Ceiling Fans
    • Ceiling Lights
    • Lamps
    • LED Lights
    • Outdoor Lights
    • Smart Lights
    • Wall Lights
  • Wellness & Safety
  • Shop Products

Informational

Ceiling Fan Terminology Explained

Ceiling Fan Terminology Explained

by admin · Feb 2, 2025

A Helpful Glossary of Common Ceiling Fan Terms

If you’re shopping for ceiling fans and it’s starting to feel like the descriptions are written in code, don’t worry! We’re here to solve the mystery with a list of basic terms you’ll need to know when looking for the right ceiling fan.

Ceiling Fan Types

Ceiling fans are most often categorized by their motor type, mount type, and/or weather rating. 

Motors

AC and DC Motors

AC motors (alternating current motors) are the most popular ceiling fan motor. They’re typically less expensive than DC motors, which is great for budget buyers. They are relatively energy efficient, are very reliable, and come with around three to four different fan speeds. 

DC motors (direct current motors) are a newer technology and often use a remote instead of a wall switch. DC motors make a quieter, more powerful fan with more speed options and are more efficient than AC motors. 

Dual Motor

Dual motor fans have two adjustable fan heads attached to a central motor. Each head is adjustable to its own speed and angle. 

High-Velocity Motor

A high-velocity fan is a powerful fan. It produces a higher-than-normal amount of airflow, providing you with a stronger breeze. 

Mounts

Downrod/Shank/Extension Rod

The multiple terms for this accessory are purely regional, and all mean the same thing– the rod or bar installed between the ceiling and the fan. Downrods can be used in many rooms but create the most impact in rooms with high ceilings. Not only do they pull the eye upwards and make the room feel bigger, but they also bring the air circulation closer to you.

Standard Mount

This type of mounting system is for level ceilings. Standard mounts usually come with a 3- to 5-inch downrod, so the fan slightly hangs down into the space.

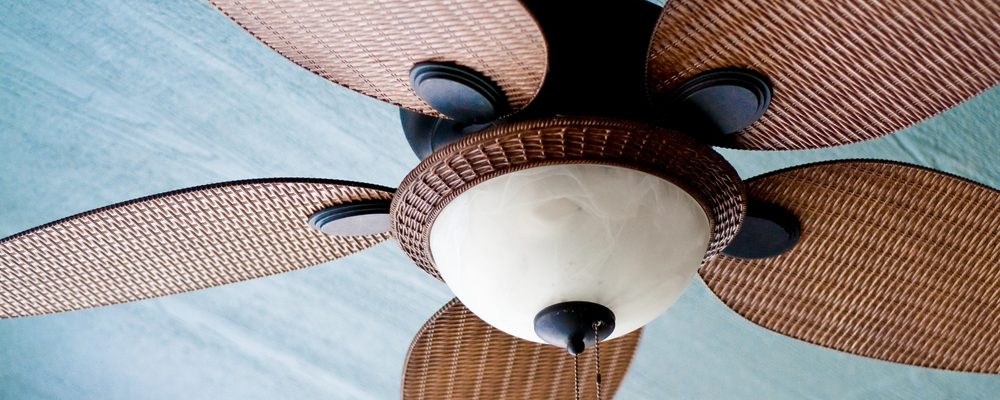
Hugger or Flush Mount

These are perfect for low ceilings and tall people. Huggers are mounted against the ceiling and don’t use a downrod. Depending on the ceiling height, huggers or flush mount fans can help the ceiling seem higher while keeping your air circulated and fresh.

Low-Profile Fan 

For a fan to be considered low-profile, it must hang down less than 12 inches from the ceiling. Most low-profile fans are flush mounts, but some fans with short downrods are small enough to qualify as low-profile as well.

Sloped Mount 

A sloped mount is a mounting system that includes a downrod that allows the ceiling fan to be installed on a vaulted or slanted ceiling. The base is designed to let the downrod and fan hang at an angle when mounted so that the fan will be perpendicular to the floor.

Rating

Wet Rated or Outdoor Rated Fans 

Outdoor or wet rated fans are designed to withstand direct contact with rain and snow. Carefully read the packaging of your outdoor fan because not all fans can handle the same weather exposure. If you live in a particularly wet or stormy area, you’ll need a tougher outdoor fan.

Industrial and Commercial Fans

Industrial fans have powerful motors and curved blades, and they can run continuously, making them ideal for large, open areas like warehouses and gyms. Commercial fans are heavier-duty than standard fans and more aesthetically pleasing than industrial fans. They’re commonly found in schools, businesses, and restaurants.

Ceiling Fan Measurements 

This section covers the most common measurements used to describe a ceiling fan’s function and size.

Airflow (CFM)

Cubic feet per minute (CFM) refers to the amount of air moved by a ceiling fan, using the amount of air moved per cubic foot in one minute as the metric. The higher the airflow a fan uses, the more efficient your home can be as you recycle heated or cooled air. According to Energy Star, 75 CFM is the minimum airflow of an efficient ceiling fan.  

Blade Pitch 

The pitch measures the angle of the blades compared to the ground. Fan blades are slightly angled to push the air around. (If they were parallel to the floor, they wouldn’t do much!) The angle of blade pitches typically ranges between 10 and 25 degrees, but the most efficient is from 10 to 15 degrees. 

Blade Sweep or Span 

A fan’s sweep or span measures the diameter of the circle created by the blades. You’ll need to know the span of your fan to make sure it will fit properly in your room – if it’s too large it could scrape walls or snag curtains. On the other hand, it may be distracting and look out of place if it’s too small.

Motor Speed (RPM)

Revolutions per minute (RPM) refers to the speed of the blades as they rotate, measured by how many times the blades make a complete circle in one minute. High RPM fans move more air than low RPM fans of the same size, making them more efficient. 

Watt Equivalence

Some fans will require more electrical power (watts) than others, so it’s essential to have a good understanding of how much strain your new fan will put on the existing circuit. A good rule of thumb is the longer the fan blades, the more watts it will use. Expect your fan to use 55 to 100 watts.

Weight

Residential ceiling fans typically weigh anywhere from 8 pounds to 50 pounds. Keep in mind that lightweight ceiling fans are designed to hold their weight alone. You should never add anything to a ceiling fan that wasn’t in the original kit without carefully reading the manufacturer’s instructions. Some ceiling fans allow for customizable light kits. In that case, be sure to check the packaging for how much additional weight it can hold.

Number of Speeds

Most ceiling fans will have multiple speed settings so that you can control the amount of airflow and circulation in your space. Most fans will have three speeds (slow, medium, and maximum speed). You’ll also want to see if your fan can reverse direction– this will help pull warm air down from the ceiling during the winter and help to cycle your heated air.

Dimensions

You’ll need to check several measurements to ensure your fan fits correctly in the space. For example, both depth and width can refer to the blade span (or the size of the circle the fan will make). The width can also describe how wide the individual blades are. Finally, as mentioned earlier, the downrod is the pole that connects the fan to the ceiling mount. Together, these three dimensions will tell you how much space the fan will take up.

Pro tip: All fans are designed for specific square footage, meaning that some are designed to push air through large rooms while others are for small rooms. Fans designed for bigger spaces would be disruptive in a smaller room (and vice versa). The packaging of your fan will tell you the intended size of the room, so make sure to check the square footage of the intended space and match it to the appropriate fan. 

Parts and Accessories 

The final section describes potential upgrades and customization options to consider while shopping for your ceiling fan.

Light Kits

Many fans come with a light fixture attached (called an integrated light), but some can be purchased and attached depending on the fan. There are three different light kits that you can use with your fan: uplight kits which sit on top of the fan and point upwards, branched or stemmed kits use globes or shades that point up or down, but the most common light kit is the bowl or shade kit which attaches to the bottom of the fan. Keep in mind that some ceiling fans with an integrated light may not include a bulb– you may need to purchase bulbs separately.

Remote Control

Many fans available today are remote control or smart-home compatible. A remotely controlled fan may seem like a luxury, but it’s also very practical – especially for those with extremely high ceilings! Depending on the model and features, you’ll be able to adjust the lights, fan direction, and fan speed with ease. 

Reversible Blades 

Some fans allow for their blades to spin either clockwise or counterclockwise. This functionality helps to customize airflow according to the season. For example, the blades should turn counterclockwise in the summer to push the air down (a downdraft), providing cool breezes.  The fan blades should rotate clockwise to pull air upwards (an updraft) in the winter, efficiently recycling heated air without cooling the room. You can either toggle the switch on the fan or use a remote to change the direction of the blades. 

———————-

Ready to switch out your builder-grade fan or install a new one in the place of an existing light fixture? Now that you have a reference to all of the features and parts of a ceiling fan, you can shop confidently.

If you’d like additional information, a professional opinion, or installation assistance, contact the experts at Hobrecht Lighting, and we’ll make sure you get exactly what you are looking for! 
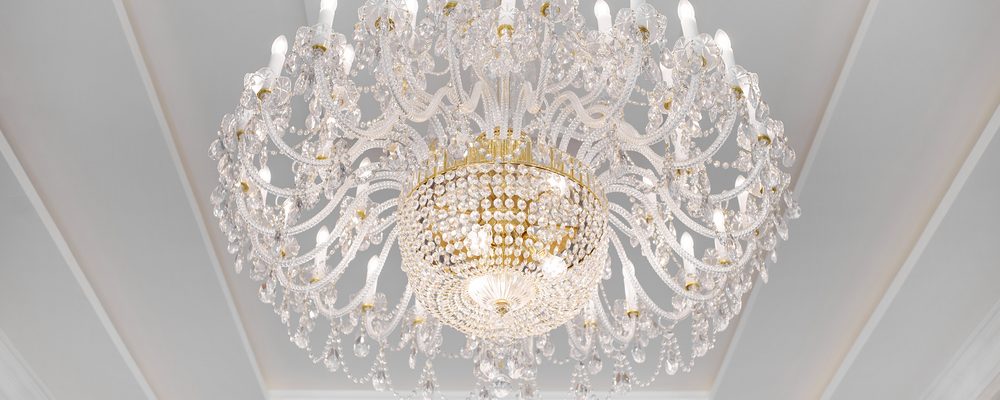
Filed Under: 2022, Buying Guides, Ceiling Fans, Informational

Chandeliers vs. Pendant Lights: What’s the Difference?

Chandeliers vs. Pendant Lights: What’s the Difference?

by admin · Dec 15, 2024

Chandeliers and pendant lights both make a statement in any space. Because they’re very similar, they are often confused for one another. While they both hang down from the ceiling, there are a few key differences you need to know that can help you choose what’s best for your home.


Chandelier

A chandelier has a central body with multiple lighted branching arms. It usually hangs suspended from a chain.


Pendant Light


A pendant light has a cord or chain with one light attached. Sometimes pendant lights have multiple lights, but if they do, they’re usually surrounded by a structure 

like the one pictured above.


Similarities and Differences

Style

The biggest difference between a chandelier and a pendant light is how it looks. Chandeliers are more intricate and ornate. They make a big statement and add elegance to a room. Chandeliers will be the center of attention. Pendant lights come in a wide variety of shapes and styles. When compared to a chandelier, pendants are usually smaller and have a cleaner, more minimal feel.

Use

Chandeliers and Pendants can both be used in any room in the house! Chandeliers are usually used to provide ambient light (illuminates a space evenly) in large spaces, but their ornate designs can create shadows. Because there are many lights on one chandelier, you may only need one to illuminate a whole room. Pendant lights are better for direct lighting (over a kitchen table, for example). Since there’s usually only one bulb per fixture, smaller pendant lights are often used in groups, like a set of 3 over a kitchen island.

Cost

While there are exceptions, chandeliers tend to be much more expensive than pendant lights. Chandeliers also often require professional installation due to their size and weight, which may add extra to your total bill. On the flip side, a handy homeowner can sometimes hang a pendant light by themself! If you’re comparison shopping, don’t forget to consider the number of fixtures you’ll need when calculating cost.

Maintenance

When choosing between these two statement fixtures, be sure to consider maintenance. Since pendant lights are simpler, they are usually easier to clean and have simpler lightbulb changes. On the other hand, chandeliers can be more challenging to maintain because of their delicate design. If you’re looking for easier maintenance, a pendant light is your best bet.


Pros and Cons

Chandeliers and pendant lights are both great options, but to help you make up your mind, we rounded up all of the details above here as some quick-reference pros and cons.

No matter which you choose, chandeliers and pendant lights will both make a statement and show off your style! If you’re still not sure which is right for you, give our experts at Hobrecht Lighting a call for personalized advice!


Filed Under: 2022, Informational

A Guide to the Basic Types of Light and How to Use Them In Your Home

A Guide to the Basic Types of Light and How to Use Them In Your Home

by admin · Dec 1, 2024

Light is all around us, controls what we do and how our body runs. Yet, most people haven’t given much thought to the kinds of light that surround them. In this article, we’ll cover the basics of both as we explain how to use light to your advantage.

Types of Light in Interior Design

When we talk about interior design, there are a lot of different words that get tossed around about lighting. It can get a little confusing, but the good news is, if you can get down these main types of light you’ll be 90% good to go! 

  • General/Ambient: This is the main source of light for a space. It fills the room with bright, balanced, even light. This usually comes from an overhead fixture centered in the room or an array of recessed lights.
  • Task: Task lighting is usually bright and used in combination with ambient light. It’s extra light that is strategically placed to add focused light to a workspace, like a kitchen counter or writing desk.
  • Accent: Accent light refers to light that is more about design than function. Spotlights, track lights, and strip LEDs can fall into this category. They often shine on artwork or architectural features like high ceilings or feature fireplaces. Although accent light does fill a function, the main value is decorative.
  • Mood: Mood lighting is generally soft, dim light. It encourages a calm or romantic atmosphere. Most often this is done with lamps, candles, or lights on dimmer switches.

When designing a lighting plan for your home, it’s important to create “layers” of light by including several types of lighting in each space. To see this in action, here’s a breakdown of the types of light found in this bedroom:

  • General/Ambient: Array of recessed lights along the ceiling
  • Task: Reading lamps on either side of the bed
  • Accent: LED light strip tucked around the edges of a coved ceiling, recessed lights shining on wall panel details, decorative sconces on wall centered around the dresser
  • Mood: Soft lights under closet doors, dimmer switches on several fixtures

This room is a great example of the way layered light adds to the design of a space without being overwhelming. Remember, you won’t usually be using all of these lights at the same time – but having options lets you customize the space for, however, you need to use it at the moment.

Other Types of Light

For most of your home projects, understanding the main types of lighting should be sufficient, but there are a few other lighting terms you may hear. Here are a few of the most popular terms: 

Diffused Light

Properties: Gentle, encourages relaxation

Best locations: Bedrooms, tub, Living Room, Dining Room

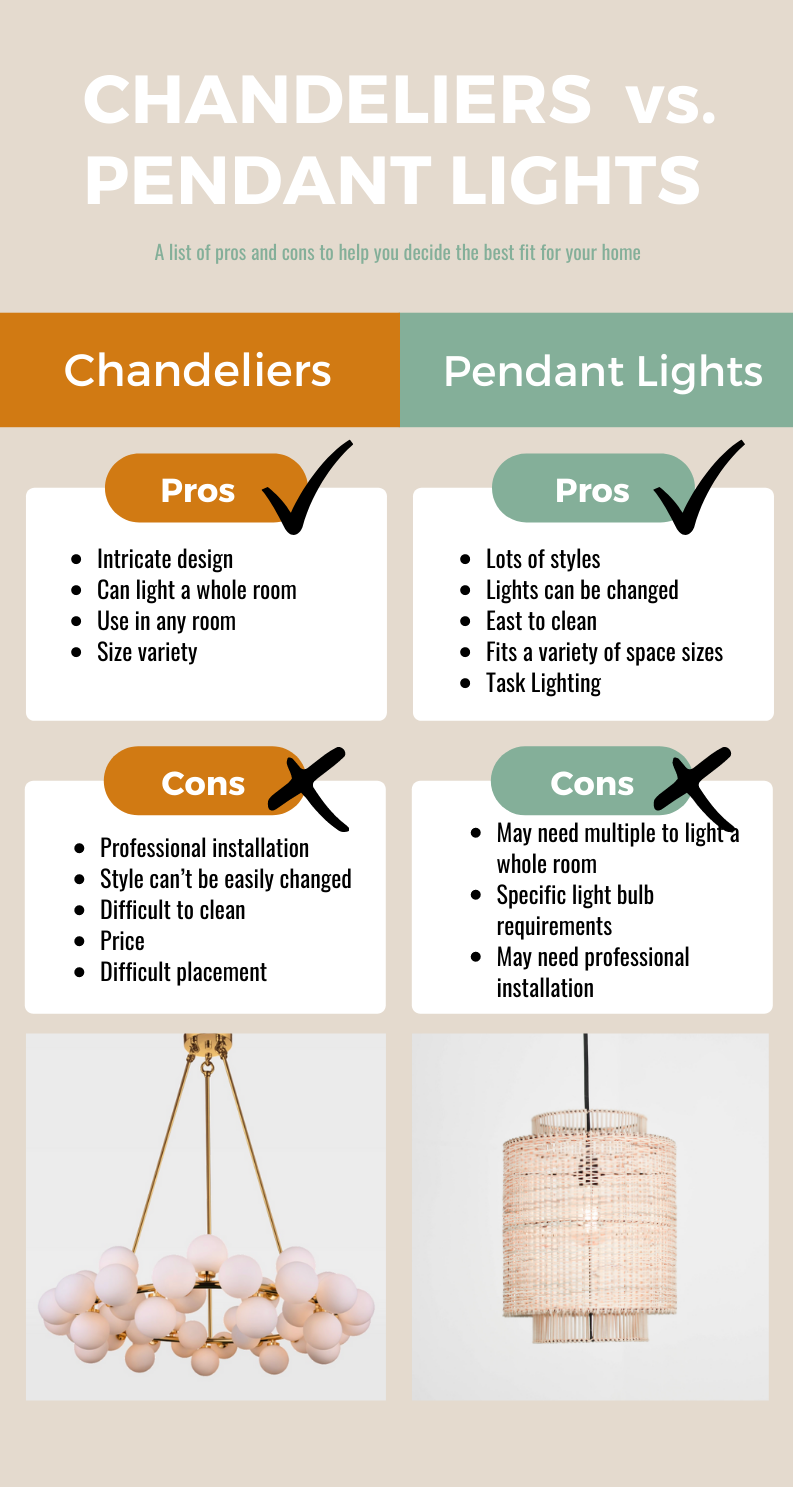
Diffused light is a natural companion to warm light. This term refers to light that is scattered and doesn’t cast a hard shadow. You can create this effect through reflected or covered lighting. We’ll focus on the latter here and touch more on reflected light in the next section.

Breaking up light makes it less harsh and more relaxed, cozy. Popular design elements are boho wicker chandeliers, modern plastic-covered lights, or paper lanterns. Both allow for plenty of light but filter the harshness of the bulb.

The opposite of diffused light is hard light. This light shines directly from the source and casts a hard shadow. This light is often found in workspaces like the kitchen or office. 

Reflected Light

Properties: Gentle, amplifies space

Best locations: Kitchen, Living Rooms, Bedrooms

This term has more to do with how light reacts in a design after it hits a surface in your home than with the source of the light. There are a few things that will affect how the light hits, and bounces off, the objects in your home. 

Color

Light colors reflect light, and dark colors absorb light. You can make a room feel big and spacious with just a coat of light-colored paint on the walls and ceiling. If you go dark on your walls, you’ll often need to add additional light sources to keep your room from feeling small.

Finish

Smooth, glossy finishes like wood floors or metallic furniture will reflect light and bounce it back out into the room. Interiors with lots of glossy surfaces can get away with fewer light sources. If your room feels a little too bright – try adding in some softer, textured surfaces like a fabric sofa, a rug, pillows and blankets, or textured wall art. 

Backlight

Properties: Highlights design, provides contrast, decreases eye strain

Best locations: Closets, Bookshelves, Cove ceilings, Wall panels, Kitchen cabinets, TVs and Computer Screens

Backlighting is the practice of lighting an object from behind. With a soft light source behind it, your bed, tv, art, or mirror will look like it’s glowing. In interior design, backlighting can also refer to the practice of lighting a wall, floor, or other surfaces with soft light (as seen above) to give the illusion of continuous, shadow-free illumination. 

As A Design Element

The key to successful backlighting is to tuck the light sources out of view and in reflective areas. In interior design, backlighting is usually found tucked into the recesses of architectural details like cove ceilings or wall panels, or around cabinets, bookshelves, and closets.

Behind Screens

Another common use for backlighting has a little less to do with design and more to do with function. Running a strip of LED lights along the back of a TV screen or computer monitor creates a soft glow around the edges of the screen, which reduces the strain on your eyes. Light used in this context is also often called bias lighting.

Light Temperature

The temperature of light refers to its energy and wavelength. Higher energy light can appear blue and is called cool. Lower energy light appears yellow or red and is called warm. The temperature of the bulbs you put in your light fixtures can actually impact how you feel while you’re in the space, and can even affect your sleeping patterns.  

Traditional incandescent bulbs only gave off warm light, so there was little variety in the light temperature of interior light fixtures. But LED technology has created light bulbs that can give off any wavelength from cool to warm, and some bulbs can change color with the click of a button on a remote. 

Homeowners now have a much wider range of color temperatures to choose from – so it’s important to understand how these light temperatures affect you when you’re lighting your home.

Cool Light

Properties: Alertness, attention, working brain

Best Locations: Office, Kitchen, Vanity, Bathroom Mirror

Blue light is receiving a lot of negative attention these days, but it’s not all bad. Blue light is a very important part of both our daily cycle and our workday.

The biggest source of blue light is the sun. The blue spectrum of light activates our attentive brain, which helps to keep us alert.

Since blue light is excellent for concentration, it is perfect for work areas. The kitchen, home offices, homework areas, and around mirrors are perfect locations. It’s often used for general lighting and task lighting. Cool lights allow the whole family to focus up and get great work done. 

Because cool light keeps your brain alert, it’s best to turn off all blue light sources 2 hours before bed. That includes your phone screens and TVs – if you’re not getting great sleep at night, try changing your relationship with blue light. It can make a big difference! 

Warm Light

Properties: Relaxation, sleep, resting brain

Best Locations: Bedrooms, Living Room, Dining Room, Bathtub

This light has a longer wavelength, travels more slowly, and outputs less energy.  Warm light signals our brains to relax and encourages rest and sleep. 

Fire, such as from a candle or fireplace, is a natural source of red light. Sitting around a fire at night to feel cozy or romantic isn’t an arbitrary human idea – it’s biology!

Warm light sources are perfect for bedrooms, tub areas, living rooms, or dining areas. Ending your day in warm light will help your body to relax and get ready for excellent, restorative sleep.

Natural/Neutral Light

Properties: In between warm and cool light, bright but not harsh

Best locations: Substitute for cool light for sensitive eyes

There is a third bulb temperature marketed today. Natural or neutral bulbs give off light in between cool and warm. These bulbs may be particularly useful for those with light sensitivity problems. These bulbs are bright enough to fill ambient lighting needs to work in without feeling harsh. 

Ask the Pros

It can feel intimidating to design the light of your home. The lighting pros at LitLiving are available to help you combine your aesthetic, room needs, and budget as they connect you with the best lighting showrooms around.


Filed Under: 2022, Informational

How Many Blades Does Your Ceiling Fan Really Need?

How Many Blades Does Your Ceiling Fan Really Need?

by admin · Oct 13, 2024

Ceiling fans are great at providing comfort year-round. A good ceiling fan will help you save on energy costs by circulating the air in your home. In the summer they create a draft, making the room feel cooler. In cold weather, you can switch the fan’s direction to circulate warm air from central heating around the room. 

Ceiling fans are so ubiquitous that for many people it’s hard to imagine life without one! So what happens when your fan breaks, and it’s time to get a new one? 

If you’ve shopped for ceiling fans recently, you know that there are a lot of options. From the ultra-modern models with a single fan blade, to the “windmill” design fans with so many blades that there’s hardly any space between them – many homeowners on the hunt start to ask: 

How many blades does my ceiling fan really need? 

Does the blade count actually change anything, or is it just for aesthetics? 

In short, the answer is “yes to both.” The blade count on a ceiling fan is largely viewed as a style issue, but it does impact the way the fan works. Apart from the obvious design differences, the number of blades on a fan will also affect its noise level and energy consumption. 

Noise Level

The fewer the blades, the faster a fan needs to spin to move the same amount of air. Lots of spinning means lots of moving parts, which usually translates to more noise. Take large industrial fans, for example – they typically have two or three blades and are pretty loud. 

On the other end of the spectrum, fans with higher blade counts can move a lot of air spinning at a slower rate. Less motion means less noise – windmill-style fans with eight to ten blades are virtually silent. 

There isn’t an exact cutoff between noisy versus quiet fans, but a good middle range is around five. If you want a quieter fan, one with five or more blades will likely be your best choice. 

Energy Efficiency

Another thing to consider when choosing a fan is how much it will cost to run. Fans with more blades create more drag, requiring more energy to operate. This is one reason why large, always-on fans (like you’d see in a commercial space) often only have three blades. They may be a bit noisier, but they save on energy costs.

While its blade count does impact the energy efficiency of a fan, it’s definitely not the only factor involved. The efficiency of fans can also be affected by the length and angle of the blades and by the type of motor it uses. It’s best to check the energy rating of your fan when possible. 

Style and Aesthetics

Aside from energy efficiency and noise level, the main difference between fans with high and low blade counts is really just style and aesthetics. “Windmill” styles with eight to twelve blades can feel rustic, whereas fans with two to three blades usually feel minimalist and industrial. 

How do I know what the right number is for me?

The short answer to this question is – it really doesn’t matter very much for most people. It doesn’t matter whether noise levels, energy efficiency, or aesthetics are your top priority; it’s pretty likely that you’ll be able to find a fan that will meet your needs in all three categories. 

Most often, it’s safe to shop by your style preferences first, then find a fan that meets your noise and efficiency needs from that selection. A modern, high-quality ceiling fan will be designed to work well regardless of the blade count.

If you’re looking for a quality fan that will keep you cool for years to come, stop by our showroom or give us a call. Our lighting experts are ready and waiting to help you find exactly what you need!

Filed Under: 2022, Ceiling Fans, Informational

Lumens vs Watts: What’s the Difference?

Lumens vs Watts: What’s the Difference?

by admin · Jul 21, 2024

Light bulbs have been lighting up our world for over a hundred years, but do we really understand how they work? When you go to the store to buy a replacement bulb, the box labels are filled with numbers and industry terms that can leave you wondering how to know which bulb you actually need.

Fortunately, understanding the difference between lumens and watts is fairly straightforward. Take a quick minute to read this quick summary, and you’ll be ready to hit the stores to find exactly what you need.

Lumens

Lumens measure the amount of light a bulb emits. The technical definition is “the unit of luminous flux, equal to the luminous flux emitted in a unit solid angle by a point source of one candle intensity.” In less scientific terms, the higher the lumen rating, the brighter the bulb. Most mainstream bulb labels use the full term, but if you can’t find the word “lumens” on the label look for its abbreviation, lm.

How many lumens do I need?

Contrary to popular belief, you shouldn’t put the brightest bulbs you can find in every area of your home. The rooms in your home will all need different levels of light, depending on how you use them. Use bulbs with a high lumen count in areas where you need a much brighter light, like above your kitchen counters. You need much less light in your bedroom, so consider going with lower lumen count bulbs in warmer colors to keep it a relaxing space where you can get some sleep.

While there are complicated equations out there that you can use to calculate your “exact” lumen requirements, the trouble is that every person and every space is different. You may find that you prefer brighter lights than what’s “necessary” in one place and dimmer lights in another. Your best bet is to try a few different bulbs, or better yet – get a dimmer switch so that you can customize your light levels depending on your needs for the day.

Pro Tip: Lumens can be added across several light sources in a space. It’s not an exact science because it doesn’t take into account distance from the source and the angles of the light, but if you have three 800lm bulbs in a room, it will be lit with roughly 1800lm.

Watts

Watts measure the amount of power consumed by the bulb. One watt isn’t much, it’s equal to 1/746 horsepower. It’s named after James Watt, a Scottish inventor credited for creating a steam engine during the Industrial Revolution. The symbol for watts is “W”.

Most electrical devices are rated in watts, although large appliances that use more power are often measured in kilowatts, which is equal to one thousand watts. (1W = 1000kW)

The wattage of a bulb will tell you only how much power it consumes, not how bright it is. The lower the watt rating on the bulb, the cheaper it will be on your energy bill to light your house.

Before you buy, always check your light fixture for its watt rating. Never put a bulb with a higher watt rating than the fixture can handle. If the bulb tries to pull more power than the fixture can handle, it could start a fire.

 Energy-Efficient Bulbs

Before the days of LED bulbs, it was pretty easy to get a good idea of how bright a bulb was by simply looking at the wattage. The higher the watts, the brighter the bulb. LED lightbulbs can give off the same amount of light as a traditional bulb using far fewer watts. This is what the labels mean when they say the bulbs are “energy efficient” – they need less power to provide equivalent light.

TL;DR Lumens and Watts

Lumens and Watts both describe how a lightbulb works. Lumens measure the amount of light a bulb emits – the higher the lumens the brighter the bulb. Watts measure the amount of power a light bulb uses. Newer light bulbs like LEDs can produce a lot of light (lumens) using very little power (watts), making them more energy-efficient.

——–

Need help finding the right light bulb? Give the experts at Hobrecht Lighting a call!

Filed Under: 2022, Energy, Energy Efficient Lighting, General Lighting Tips, Informational, Light Bulbs, Lighting Types

How to Choose the Right Recessed Lights for Your Home : An In-Depth Homeowners Guide

How to Choose the Right Recessed Lights for Your Home : An In-Depth Homeowners Guide

by admin · Jul 14, 2024

Recessed lights go by many names, such as downlights, pot lights, can lights, and puck lights. No matter the name, they all refer to light fixtures that are installed inside (recessed into) your ceiling. They shine light into the room without hanging down into the space like a chandelier or a flush mount fixture. 

There’s a lot to know about recessed lights before you install them in your home, but it can be hard to find all of the information you need in one place. So we’ve put together this handy guide with everything you need to know in one place to help you decide which recessed light is right for you!

Recessed Lights 101

Before we get into the nitty-gritty details, here’s a quick overview of some of the most important terms you need to know when shopping for recessed lighting.

Recessed Lighting Terms

There are three parts to a recessed light: the housing, the bulb, and the trim. The housing holds all of the wires and connectors inside a protective case that sits inside your ceiling, out of sight. The bulb is the part that gives off light. The trim is the visible portion of a recessed light that covers the housing and the hole in the ceiling, giving it a finished look. 

You’ll also need to pay attention to how widely the trim allows the light to shine – this is called the Beam Angle. Recessed light beam angles can range from a narrow 15-degree spotlight to a 120-degree floodlight. Generally speaking, anything from 60 to 120 degrees will work well for general lighting in your home.

Types of Recessed Lights

Traditional – These are the original recessed lights. They’ve been around the longest, but they have their pros and cons. They’re cheaper to purchase but more expensive to operate than LED options. They also produce heat, so you’ll need to be conscious of location.

LED – These newer recessed lights may cost more upfront, but they use considerably less power to run, which makes them cheaper to use. LED bulbs last for a very long time, so you won’t have to pay to replace them every year. They also produce minimal heat, making them a safer alternative to traditional lights. 

Ultra-Thin / Canless – These are a small subsection of LED recessed lights that have been designed specifically for use in remodels. The housing in these recessed lights is about as thick as drywall, so they’re much easier to install in an existing ceiling.

Ease of Install

If you’re replacing an old recessed light with a new one, installation is a pretty basic homeowner DIY. If you’re trying to add recessed lights where they weren’t before, that’s usually a much larger project. 

Recessed lights typically have a large housing, which means they need to be installed between the framing lumber in your ceiling. In new builds, this isn’t a problem because the spacing of your lights can be planned out during construction. If you’re installing recessed lights after the fact, creating an evenly spaced grid of lights can be a little bit more difficult. You’ll likely need to hire an electrician or contractor to help run the wiring correctly.

Canless lights are often the best choice for renovations because they can be installed almost anywhere in the ceiling. While easier to install, it’s still a pretty significant electrical project. If you’re comfortable with that type of DIY work you can give it a try, but most homeowners usually hire a professional.

Sizing

Homeowners are often surprised at the size of their recessed lights after they’ve been installed. It’s important to know that the measurement on the packaging of a recessed light refers to the size of the light’s housing, not to the size of the trim.

The measurement on the packaging tells you how large the hole will need to be in your ceiling so that you can plan out your spacing. You’ll also need to take into account the size of the trim.

Remember, the trim on a recessed light is there to cover the edges of the light and the hole, so it sits below the drywall and extends out from the fixture. Because trim styles vary, a 4” recessed light could appear 5, 6, or even 7 inches wide once installed.

Make sure you double-check that you measured the right part before you cut, or you could end up with a lot of drywall patching!

How to Choose the Right Size

Recessed lights come in a lot of different sizes, but the 6” size has been an unofficial industry standard for a long time. Now, with LED technology, manufacturers are finding ways to create the same amount of light in smaller packaging. Their smaller 4” counterparts pack a pretty big punch for their size, and they just might end up being a better fit for your space.

Light Coverage 

If you’re lighting an entire room with recessed lights, both 4” and 6” sizes will do the job well. They are pretty interchangeable as a general lighting option, but there are a few things to consider.

Ceiling Height: You’ll need to consider the height of your ceilings. Both 4” and 6” work well at standard ceiling height. For vaulted ceilings, you might want to consider sticking with larger lights with wide beam angles – the taller the ceiling, the more evenly diffused the light will be across your space. 

Existing Fixtures: If you’re adding recessed lights to work together with an existing light fixture like a chandelier or a ceiling fan, take stock of the way the existing fixture lights the space at different times throughout the day and at night. 6” recessed lights can help raise overall ambient light if the room is too dim. 4” lights are often a better choice if you need lighting around the dark edges of a room. 

How You Use the Room: The rooms in your home don’t need an equal amount of light in every square inch. Your rooms will feel better if the lighting is tailored to the way you use them. 

For example, this kitchen has beautiful pendant lights, but on their own they’d cast shadows onto the kitchen worksurfaces. This homeowner installed a row of recessed lights around the perimeter of the kitchen to provide better light on the countertop prep surfaces. In the dining area, a softer chandelier on a separate switch lights the table, which gives it a more comfortable, relaxing feel for when it’s time to eat.

Cost

4” lights are going to cost you less upfront simply because they’re smaller and cost less to make – although prices are going to vary based on materials, finishes, and special features. They also cost less to run because they use less power. 

6” lights may cost more, but (depending on the specific fixture) you may be able to use fewer 6” lights to achieve the same coverage as a larger number of 4” lights. 

If you’re on a tight budget, you’ll want to map out your room with both sizes and then run the numbers both ways to make sure you’re getting the best deal. 

Decor

For years now, homeowners have been ditching ceiling lights in favor of a grid of recessed lights. But, the lack of visual interest is starting to sway designers back towards beautiful statement ceiling light fixtures like chandeliers and pendants. 

In rooms where modern statement fixtures are providing most of the ambient light for space, larger recessed lights aren’t really necessary. 4” lights are a much better option for creating beautiful layers of light without over-lighting your space. You’ll find this size most often in rooms with a modern design.

You’ll find 6” lights most often in large open rooms that need a lot of light, and in rooms with more traditional decor. 

Because 6” lights are more common, they currently have more trim styles available. If you have a specific style of trim in mind, make sure you find out if it’s available in the size you want before you buy!

Location/Uses

4” recessed lights are most commonly used in smaller spaces like hallways, home offices, and over the kitchen sink. They’re perfect for lighting a reading or craft area where you want to see what you’re doing. They’re also a great size for highlighting artwork or architectural features without washing them out. 

6” lights do their best work lighting a large room like a living room or dining room. They’re also a great choice for rooms with high ceilings, as their larger size will help to spread the light more uniformly throughout the space.

Properly placed recessed lights can make your rooms feel bigger if you employ a technique called Wall Washing. Wrapping your room in 4” recessed lights will evenly coat the wall with light, making the entire space feel more spacious. This is a great trick for smaller spaces like hallways and narrow rooms, and it helps to hide imperfections in the wall finish. 

Placement is important here – if your recessed lights are installed too close to the wall, they’ll create a cone of light (called wall grazing) which will not have the same space-creating effect. The goal is to get soft, even coverage across the wall without any harsh lines.

Overview

To sum it all up, here’s a handy comparison between 4” and 6” recessed lights. 

Other Things to Consider

The size you choose matters, but there are other things you need to consider before purchasing! LED recessed lighting has come a long way in the past few years, and new features are regularly being added to the lineup.

Color

LED lights come in a wide variety of colors, measured in Kelvins (K). 

Warm light (up to 3000K) appears orange or yellow, like the light from traditional incandescent bulbs. It feels soft and cozy, and is a great choice for places where you want to wind down and relax, like a bedroom or a living room. 

Daylight light (between 3000K – 4000K) is similar to the light at midday. It feels bright and white, and is a great choice for most rooms in the house. 

Cool light (above 4000K) starts to appear blue as the Kelvins increase. Blue light feels crisp and energetic and is often used in offices and hospitals to help keep people alert. Be careful with blue light in your home – it can keep you up at night! 

The color you choose for your lights will change how the paint on your walls looks, so it’s a good idea to experiment with it first before you commit. 

Color Changing lights – Some LED lights are color-changing, meaning they can be set to emit warm or cool light, which takes the stress out of worrying which temperature to choose. Some lights can be changed with a switch in the housing, which is great for homeowners that want to choose what they like, set it, and forget about it. Others can be changed with a remote control or a smart hub, making the lighting in your house truly customizable to any activity.

Dimmable

We recommend installing LED lights on a dimmer switch whenever possible! Because they are so bright, it’s nice to be able to dim the lights to a level that you’re comfortable with throughout the day. Most LED lights are already dimmable, but some aren’t, so you’ll need to double-check before purchasing if this is a feature you want in your home!

Smart Technology

Smart LED recessed lights come with the ability to communicate with other technologies in your home, like a smart hub. Depending on the features, this means you could set your lights on a schedule or even turn them on with a voice command instead of a switch. 

There are a lot of things to consider when you’re installing recessed lights. Our lighting experts know all of the ins and outs and would love to share their knowledge with you to help get you started. Give us a call or stop by our showroom and see for yourself how recessed lighting can completely transform your home.

Filed Under: 2022, How to, Informational, Recessed Lighting

Copyright © 2025